You’ve no doubt heard the term cache and temp files, at least as it relates to your Mac. There are numerous times when removing a cache or temp file may be part of a troubleshooting tip to return an app or the system to a more robust condition. It’s also common to hear about removing these files to free up space on a Mac’s startup drive.
But before we head down the road to clearing out cache and temp files, let’s take a moment to find out what functions they serve, and whether it’s really a good idea to remove them willy-nilly.
What Are Cache Files and Temp Files?
Cache and temp files serve a similar function; they provide a place to temporarily store data in files on your Mac.
Cache files are accessed and updated frequently, and they can remain after the app or system function that created them has closed or exited. They can also remain through shutdown or restart cycles.
Temp files are created by an app or system process to temporarily store data that is later used by the process that created the file. Unlike cache files, temp files are usually removed by the process that created them, usually when the process exits, or during a shutdown or restart cycle.
Examples of cache files include browser caches that save the information from a webpage. When you return to the same page, the browser can load the page data from the cache file, provided the page data hasn’t changed. This saves you the time it would take to access the web server and download the entire page again.
Another type of cache you use everyday on your Mac is the DNS cache. Like the browser cache, the DNS cache can let your Mac grab the IP address of a website it has visited recently without having to perform a DNS lookup, which can take a great deal of time.
Other caches are used by the system to store frequently used icons, images, and just about any type of information that is used over and over, where storing the data is faster than recreating the information every time.
Temp files, on the other hand, are transitory; they tend to be removed once the app or process that created them is terminated. An example of a temp file is an application that has many levels of undo. In the loosest of terms, the undo temp file holds the state of the app at each point a command was issued, letting you go back in time (undo) to previous states. When you quit the app, the undo temp file is deleted since it’s no longer needed.
Temp files can also hold static items, such as an image, or data that will be used frequently by an app but doesn’t need to be saved beyond the current app cycle.
Where Are Cache Files and Temp Files Located?
The Mac has two primary types of cache files, System and User, which are located in three primary locations. The system caches are located at /Library/Cache as well as /System/Cache. The user caches are located at ~/Library/Cache. The tilde (~) in the last cache location is a shortcut for your home folder. So, if your home folder was named tnelson, as mine is, the full path would be /Users/tnelson/Library/Cache. As you can see, it’s easier to just use the shortcut than to type full pathnames.
I recommend leaving the system caches alone unless you’re having a specific problem whose troubleshooting guide suggests removing one or more of the system cache files. Otherwise, I tend to leave system cache management to the system.
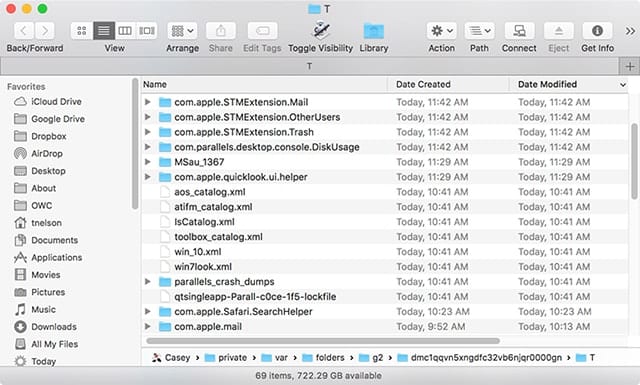
Temp files, especially those used by third-party apps, can be located just about anywhere, making some app temp files difficult to track down. However, apps that follow good coding practices will make use of a few standard locations. Unfortunately, many of these standard locations are hidden from the Finder, blocking you from direct access. You can use the following Terminal tip to open a Finder window on two of the most used temp locations:
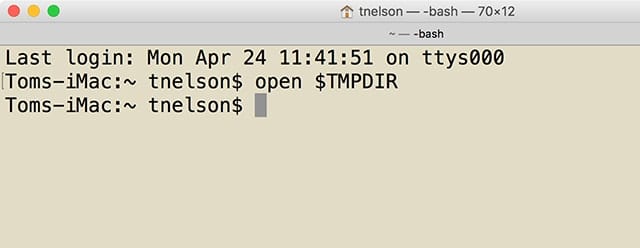
- Launch Terminal, located at /Applications/Utilities.
- Enter the following at the Terminal prompt: open $TMPDIR
- Hit Enter or Return on your keyboard.
- A Finder window will open on the current system temporary directory.
Note: The Finder window will have a different name for this directory. The $TMPDIR is a variable that holds the current temp directory pathname.
The second common temp location can also be found using Terminal. Enter the following at the Terminal prompt:
- Open /tmp
- Hit Enter or Return on your keyboard.
- A Finder window will open on the tmp directory.
Should You Remove Cache and Temp Files?
Generally speaking, the Mac’s operating system is pretty good at managing both cache and temp files. The Mac OS includes maintenance routines that are run at specific times to clear out unneeded cache and temp files. In addition, most temp files are cleared out automatically by the app or process that created them. The Mac OS will also remove many of the temp files whenever you shut down or restart your Mac.
Even though the Mac OS tends to take care of cache and temp files, there are times when manual intervention may be appropriate. As mentioned earlier, deleting cache files is a common troubleshooting tip. In these cases, a specific cache file may have become corrupt, and as a result, contains bad or meaningless information that is causing a related app to lose its mind. Cache files can also become excessively large, leading to long load times for the app that makes use of the file, or unusually long times for executing a specific function.
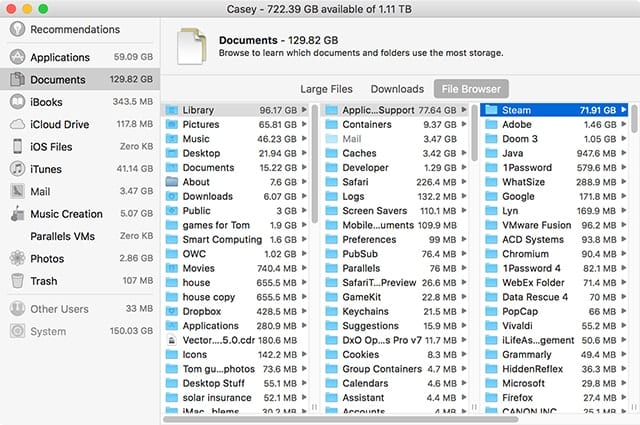
The other common reason to remove cache and temp files is to increase the amount of free space on a storage volume. In researching this article, I discovered that a number of cache files used by the Steam gaming platform had grown to over 70 GB on my Mac. This was a surprise, since I haven’t used Steam in over a year, and really had no use for those cache files. The Steam cache files got the heave-ho.
But before you dump your cache and temp files, remember that generally speaking, cache and temp files are designed to improve the performance of an app or service. So, unless you’re having issues, including needing more free space, or an app that’s behaving badly, it’s probably better to leave the cache and temp files alone and let your Mac manage them.
Removing Cache and Temp Files
Warning: Before you remove any cache or temp file, make sure you have a current backup of your Mac.
One method for removing these files is to simply navigate to their location and send the various cache and temp files to the trash. You can use the Finder and the tips mentioned above to locate the files. Do not, however, delete the various cache folders; just the actual cache files within the folders.
An even easier way to access and clear out the files is to use a third-party app designed to assist in managing cache and temp files.
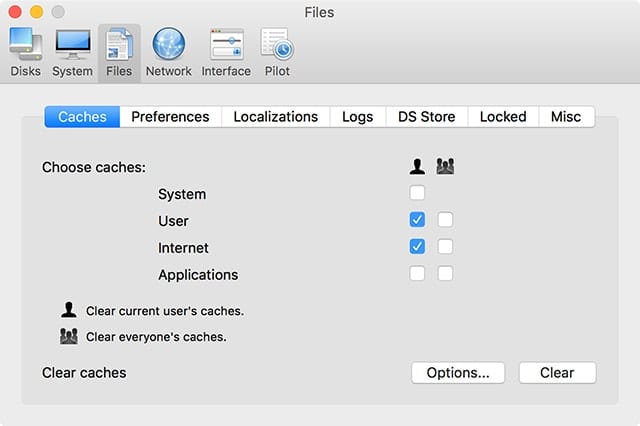
A number of these apps come to mind; most are available as demos to try out:
- Cocktail: This is a general-purpose utility for repairing and optimizing your Mac. It also gives you access to many of the Mac’s hidden settings, including the ability to run the various cache maintenance scripts.
- Onyx: Provides access to hidden Mac features, system maintenance, and the ability to customize the system and some apps.
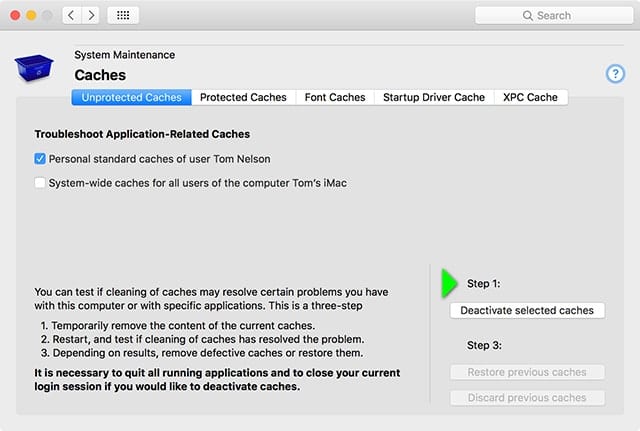
- TinkerTool System 5: Provides access to many hidden preferences and settings of the operating system. Includes the ability to restore caches if you discover that removing a cache didn’t fix an issue.
Remember that cache and temp files are there to help performance. For the most part, I don’t recommend wholesale removal of these files as any type of “maintenance” practice. Instead, selectively removing a cache or temp file as part of a troubleshooting process can be a useful task.


I’ve tried many ways. And for people who don’t know much about technology like me, cleaning cache and temp files manually would be troublesome. So I turned to thrid-party to help me, among which iMyMac Mac Cleaner satisfies my needs and saved my time.
Lots of prose, very little concrete instructions on how to do.
I’ve been using Dr Clean Elite to clear caches, and occasionally Disk Diagnostic to also delete unwanted files. They’re both free, and Dr Clean also allows to free up memory.
I use Cocktail for routine maintenance. But I recommend Maintenance to most of my friends and clients, a free app developed by the makers of Onyx (also free), because it is the least intimidating and easiest to use.
While OS X/macOS has some built-in utilities to do some of the same tasks, they are scheduled to run only at 2:00 AM., when most peoples computers are not running. All of these third party utilities make use of these “cron scripts”, so you can run them whenever you choose.
On a laptop the biggest temp file is likely to be the sleepimage, which is created by the Safe Sleep feature, which saves the contents of RAM to disk in case your computer looses power. This can occasionally be important on a laptop computer, but was conceived when they still used relatively spacious hard drives and small RAM modules. Now that all Mac laptops mostly use smaller SSDs and lots of RAM, you may not have the room to spare for a sleepimage. You can delete a sleepimage (using DaisyDisk, among others) but it will return almost immediately.
There is an easy way to disable the Safe Sleep mode in Terminal (yes, easy). First determine the current state of the hibernate mode by typing “pmset -g | grep hibernatemode” into Terminal and hitting return. If it’s enabled it will return a value of 3. Take note of this setting so you can return to it if necessary. Then type “sudo pmset -a hibernatemode 0” and hit return. You will be prompted for your admin password. After this you can type “pmset -g | grep hibernatemode” again to be sure the mode has been changed. Viola! No more sleepimage (assuming you have deleted the current one).
Best article that I’ve seen on cleaning your Mac.