


Recently, Dennis Sellers published a great article on How to Start Your M1 Mac in Safe Mode. Safe Mode is just one of many Mac startup modes. In this post I’ll list those modes for the M1 Macs, what they’re used for, and how to access them.
Diagnostics Mode
Is that shiny new M1 Mac acting flaky? To check the hardware to see if you’re having any issues, diagnostics mode is very useful.
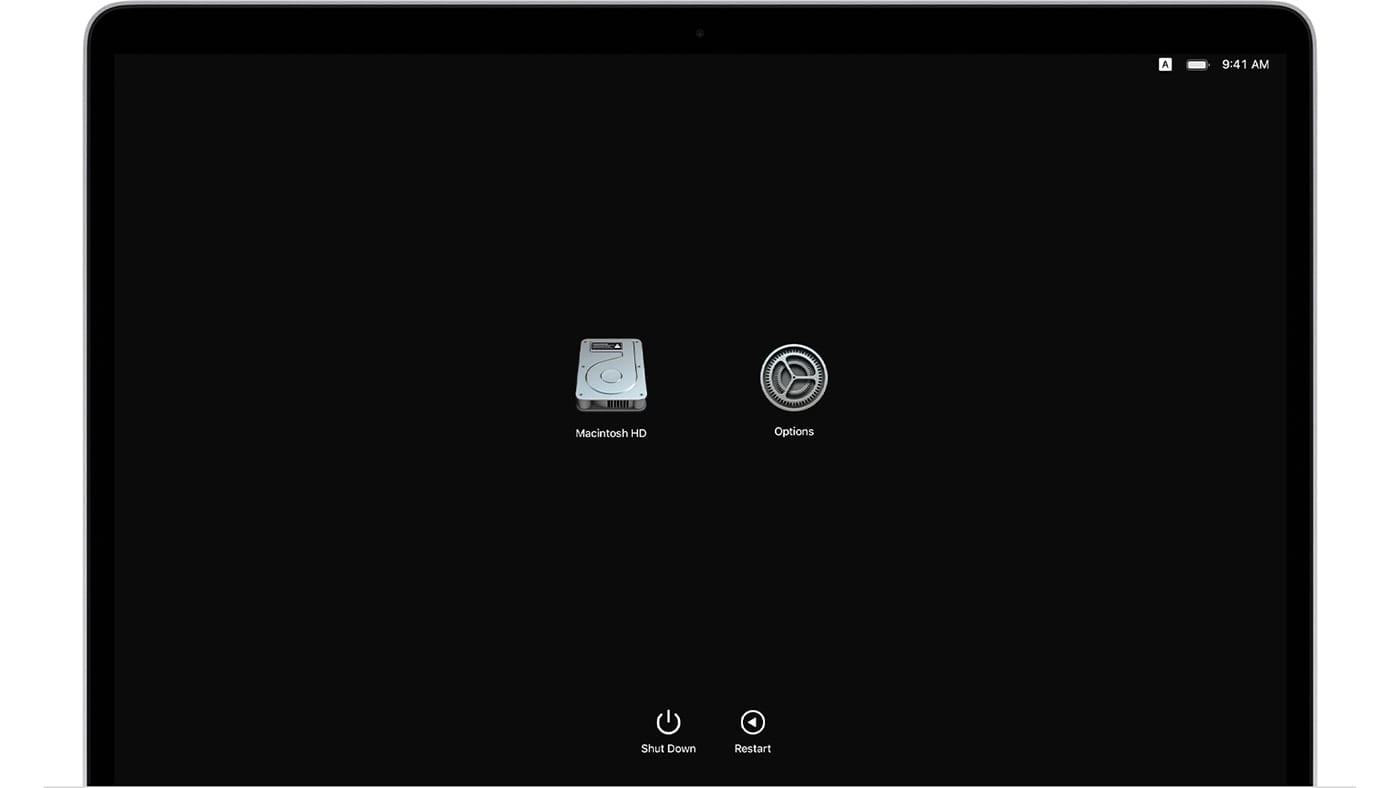
Shut down your Mac, then press the power button to start it up again. Keep holding the power button until the display shows Loading Startup Options. When the Startup Options screen fully loads, you’ll see a “gear” icon with the label Options beneath it. There are also icons for the internal and external drives. Press and hold Command ( ⌘ ) – D until the Mac restarts and the Diagnostics Loader menu appears in the menu bar.
A list of languages appears – highlight the language you need, then click the blue OK button. At this point, a screen titled “Run Diagnostics” appears (see image below), displaying a barcode with your Mac serial number, a Restart button, and a Shutdown button. In addition, there are links for Run offline and I agree.
(Sorry about the images, but normal screenshots are impossible in startup modes)
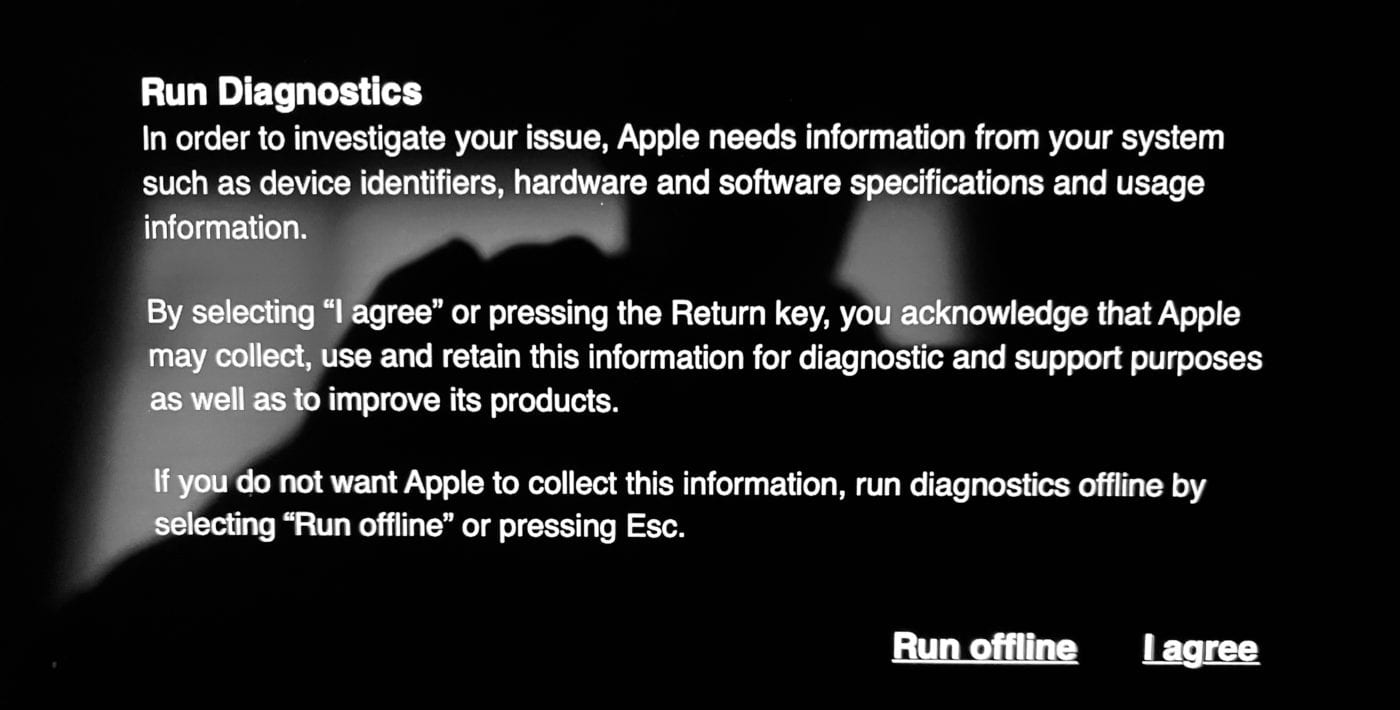
Apple uses this diagnostic tool to determine if anything is wrong with the hardware in your Mac. When you’re on the phone with an Apple support person or at an Apple Store, they’ll have you click I agree in order to share information with the support personnel. If you’re at home and just want to check your hardware, click Run offline.
After a short diagnostic check lasting about a minute, a screen appears. It displays any issues found and diagnostic codes for those issues. Clicking Get started launches Safari and displays a screen of Apple Diagnostics reference codes that pinpoint the hardware issue.
Once you know what the issue is, you’re free to restart or shut down your Mac.
Recovery Mode
Recovery mode is used to check the startup disk, reinstall macOS, restore from a backup, or change security settings. To enter recovery mode, press and hold the power button on an M1 Mac that is shut down, wait until the display shows Loading Startup Options, then release it.
The Startup Options screen appears. Select the Options icon (the “Gear” icon) by clicking it, then click Continue beneath it. A macOS Recovery screen appears, asking you to “select a user you know the password for”. Select a user by clicking his or her icon, then click Next.
Enter the password for the selected user, then click Continue. The following screen appears:
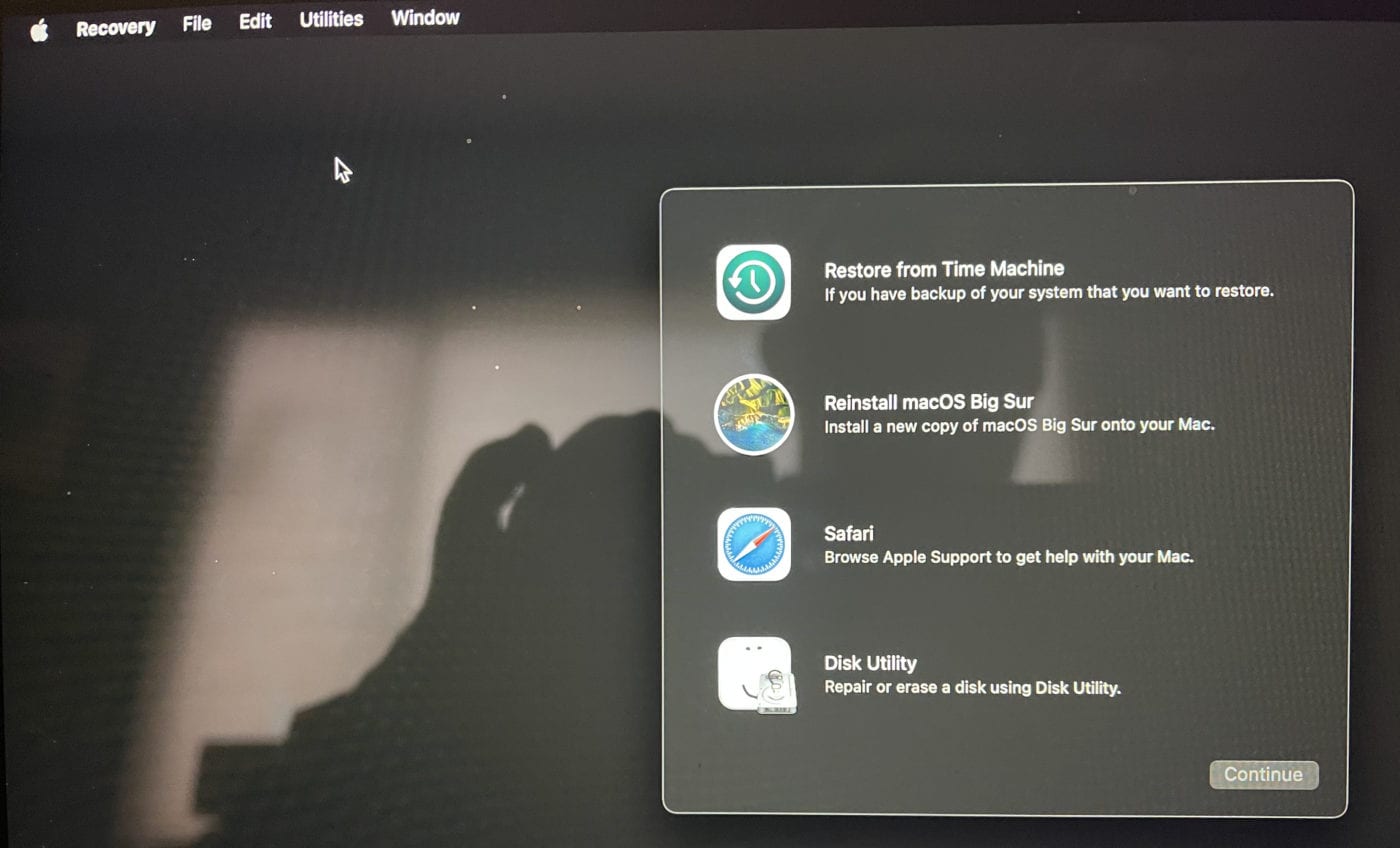
In the main window, there are selections for restoring from a Time Machine backup, Reinstalling macOS, opening Safari to browse Apple Support, and starting Disk Utility.
Under the Apple ( ) menu are items for selecting the startup disk, restarting the Mac, or shutting the Mac down.
Under the Utilities menu are items for the Startup Security Utility (helpful when you wish to boot from an external disk or bootable USB installer disk), Terminal, and Share Disk. The latter is a replacement for the old Target Disk Mode, allowing you to access a Mac’s disk drive from another Mac over a USB or Thunderbolt cable.
Safe Mode
As mentioned at the start of this article, directions for entering Safe Mode on an M1 Mac can be found here.
Safe Mode is useful for flushing user caches and disabling third-party extensions that may cause issues.
Startup Manager
Startup Manager is used to select the boot volume. Usually there is only one boot volume, the internal drive in the Mac. However, if you have a bootable external drive attached, Startup Manager is used to select it.
If your Mac is in Recovery Mode, the boot volume can be selected under the Apple ( ) menu with Startup Disk. From a shut down Mac, press and hold the Power button until the screen displays Loading Startup Options, then release it. You’ll see the familiar Startup Options screen at this point. Allow all bootable disks to appear on the screen, select the disk you wish to boot from, then click Continue.
Set Default Startup Volume
Here we’re going to select which volume to be used to start up the Mac. Perhaps you want to boot it from an external drive rather than the internal drive – that’s where this comes in handy.
From a shut down M1 Mac, press and hold the Power button until Loading Startup Options appears, then release the button. You’ll be back at the Startup Options screen. Click on the disk you want to turn into the default boot disk, press and hold the Option key, then click Always Use.
Restore macOS from a Previous Backup
NOTE: These instructions do not work as of macOS 11.2! This may change in future releases, which is why I’m listing the instructions here.
On a shut-down Mac, press and hold the Power button until Loading Startup Options is displayed, then release it. As you have probably surmised by now, this takes you to the Startup Options screen.
Select the Options (“gear”) icon, then click Continue beneath it. This takes you to the macOS Recover window, where you select the proper user icon, then click Next. Enter the correct password for the user in the dialog, select Restore from Time Machine, then click Continue. In the next window that appears, click Continue one more time.
At this point, Time Machine System Restore lists Restore Sources. To restore from a previous backup, select the backup disk and click Continue, then select the backup you want to restore.
To revert to a previous version of macOS, select the last snapshot containing that version, then click Continue. If the backup contains a snapshot of the System volume, a dialog invites you to install that previous version of macOS. Accept it, and the snapshot is restored. The Mac reboots from that version of macOS.
In system 11.2, neither the macOS updater nor Time Machine keep System volume snapshots, which is why this feature doesn’t work and you’ll just reinstall macOS instead.
Verbose Mode
Back when I was studying for Mac OS X certification, verbose mode was a popular way to see the details of the Mac startup process. Basically what it does is show all of the processes that are being loaded in the UNIX underpinnings of macOS. When there’s something that is keeping a Mac from booting normally, or if the boot is taking longer than usual, verbose mode can pinpoint the process that is at fault.
Enter verbose mode on an Intel Mac, and all of the processes scroll by. Now, there is a way to enter verbose mode on an M1 Mac using a change in NVRAM (non-volatile RAM), but that’s not something that should be done without really knowing what you’re up to as any issues may lead to a complete system reinstall.
To set up your M1 Mac to go into verbose mode, open a Terminal window (either from a normal boot or from the Utilities menu in Recovery mode) and type in:
sudo nvram boot-args=”-v”Once the command has been entered, quit out of Terminal and reboot the Mac to enter verbose mode.
As a safer alternative, reboot the M1 Mac in Recovery mode (see instructions earlier in this post). When the Recovery mode screen appears, select Recovery Log from the Window menu. This log records the boot process, and can be set to show all logs, errors only, or errors and progress.
Unless you are aware of what all of the various startup processes entail, verbose mode is really not a tool for general usage.
DFU Mode
DFU Mode is rarely required; it allows a user to reinstall firmware on a Mac by connecting it to another Mac, then “pushing” a firmware file onto the target device. It’s a bit beyond the scope of this course, but should you have the need to reinstall firmware on your M1 Mac, here’s an Apple support document on the subject.
You now know just about everything about M1 Mac startup modes. They’re considerably different from those on Intel Macs while providing most of the same capabilities.


I was not able to set up Verbose Mode with the above command on my M3 MacBook Air.
I get the following response:
Mac:Utilities dgday$ sudo nvram boot-args=”-v”
Password:
Sorry, try again.
Password:
Error setting variable – ‘boot-args’: (iokit/common) not permitted.
Verbose mode is not even an option using the Intel-based Mac startup key sequences nor in the Options section of the M3 startup screen when you hold down the power key from shutdown.
There seems to be no need to select “Always use” when booting a volume whether internal or external. If an external disk is selected in the usual fashion and started up, then unplugged before a subsequent boot, a boot loop occurs until either the absent external drive is again attached, or the M1 Mac is forced to shut down (power button held for 4-5 seconds) and then the system is restarted in recovery mode to select an alternate startup volume. Given this behavior, the “Always use” selection seems to have no difference whatsoever from the normal selection of a boot volume. If I am incorrect, can you please demonstrate the difference. Thank you.
You should remove “Verbose” mode from this article since the M1 macs don’t do verbose mode
I’m trying to unset schg flag from a folder. In the past this would be achieved via Single User Mode, using sudo nvram boot-args=”-s”.
However my M1 Mac mini only displays a completely black screen in this mode. Is there any way to unset schg flag?
There’s also another startup option called “Fallback Recovery Mode” – see https://eclecticlight.co/2021/02/20/m1-macs-have-another-hidden-boot-mode/
No “Target” mode? :-( :-( That was one of the greatest ‘Mac tricks’, that saved my butt several times!
From the article, looks like there’s a Share Disk mode which achieves the same thing — perhaps just a change of nomenclature (and activation process)?
It’s significantly different at the tech level, but for most users will function the same way. Shared Disk Mode shares the internal disk using SMB.
Target Disk Mode was a PCIe connection to the disk that allowed for low-level access that allowed for disk repair, and advanced data recovery tools to attempt to recover someones data. These things are not possible over an SMB share that may not even work if the file system is damaged badly enough (in most cases, with every OS I’ve worked with, if the disk won’t mount, it can’t be shared via tech like SMB)
Very different to TDM, Brian! Thanks for the clarification. I was always a little worried about the security vulnerability of TDM, but there is no doubting its usefulness in certain failure modes. What is the performance of Shared Disk over TDM?
It’s now part of Recovery Mode. See https://support.apple.com/guide/mac-help/transfer-files-a-mac-apple-silicon-mchlb37e8ca7/11.0/mac/11.0