One of the most underestimated roles in film production is the Digital Imaging Technician (or DIT, for short). While the DIT will often have a later crew call than most others on set, they are often the last person to leave a stage as they are busy backing up all of the shoot material for the day. Nearly every major feature film and television series use digital cinema cameras made by Arri, RED, and Panasonic (to name a few). Digital cinema cameras record video onto proprietary flash memory devices, also known as camera mags.
The On-Set Workflow
As camera cards are recorded and filled on set, the material needs to be quickly downloaded onto external drives so that the cards can be returned to the camera department and reused. While macOS Finder can be used for offloading media, a more common DIT workflow is to use a utility like Pomfort Offload Manager or DaVinci Resolve. Why? Because these applications have media management tools built specifically for offloading cards with confidence.
First, the DIT will receive a notification if an offload was successful or not, something that Finder may not always do. Additionally, the software will produce a checksum hash. A checksum is a method of verifying that the duplicated camera media files are an exact copy – remember, the camera cards will be formatted for reuse on set.
A DIT is also the on-point liaison between production and post-production, and therefore needs to understand the recording settings for each camera. Not every production has a dedicated DIT, but many can appreciate the role of the Editor (or their Assistant), who backs up camera footage once filming has been completed. Downloading 4K, 6K, or 8K files from any camera can take a long time. Whoever is performing the media management on a project can additionally face a lot of pressure from the producers, editors, directors who all want to see the footage!
Mac Media Management
Digital media management is a field where Macs are very well suited, and Macs can be found in every corner of the film production industry. A huge component of that workflow success is Thunderbolt. With Thunderbolt technology (and a great Thunderbolt dock), anyone in production can quickly and easily download footage from camera card readers onto multiple storage mediums, often simultaneously. There are other formats like mini-SAS in this field, but more often than not, Thunderbolt is used for its plug-and-play compatibility and ease of use.
Increasingly, camera card readers such as CFast and RED have been moving to USB-C. USB-C offers greater overall speeds than the previous generation of card readers. In addition, USB-C peripherals can be easily connected to Thunderbolt docks.
Having fast card readers in a Thunderbolt workflow is important, but even more so is the choice of storage that will serve as the media destination. Faster write speeds mean faster downloads from multiple card readers. This is a scenario where you can only be as fast as your slowest component.
U.2, M.2, and SATA – What’s the Difference?
For fast and reliable data connections, the emerging U.2 standard is ideal for post-production professionals. What is U.2? Imagine an M.2 PCIe SSD in the same form factor as a hard drive, but with added benefits.
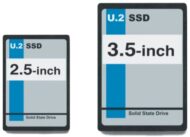
U.2 drives are typically found in 2.5” or 3.5” enclosures that have the same physical dimensions as traditional mechanical hard disks, allowing an easy migration path for existing users and products. U.2 cables plug in very similar to a standard SATA cable, which allows motherboards and other circuitry to be designed in a similar way: a cable connects the drive to the board. Unlike SATA, U.2 media operates over PCIe x4 speeds which allows for up to 6 times faster data transfer speeds versus a traditional SATA SSD.
M.2 works the same way–data is sent over PCIe lanes rather than a SATA lane, improving bandwidth. M.2 and U.2 differ because M.2 cards usually plug directly into a device or motherboard and therefore have no interconnect cables. This design choice can be both convenient and cumbersome. By placing the M.2 drive directly onto the destination board, users are limited with how they can physically interface with the device, for instance, quickly adding or removing drives from a workstation.
“I Feel the Need. The Need for Speed!”
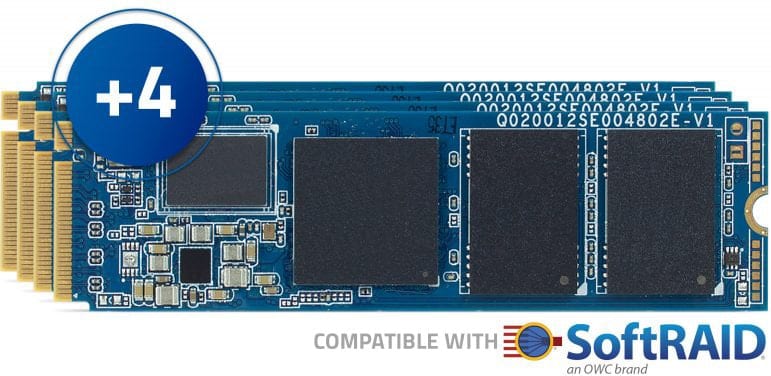
OWC has taken all of the benefits and design choices of U.2 and built a product that is the best of all worlds. The OWC U2 Shuttle takes four M.2 SSDs and combines them into one U.2 connector, places them in a RAID configuration, and encloses the array in a 3.5” form-factor. This allows the portability of a hard drive, the security of a multi-drive enclosure combined with the blisteringly fast speeds of M.2 media operating over PCIe.
The Mercury Helios 3S + U.2 NVMe Interchange System is an ideal solution for any media professional that needs to quickly and safely transport large amounts of media fast. The interchange system creates an easy drive swap carrier that can be configured up to 32TB in size. After the camera media is offloaded on set, swap out the OWC U2 Shuttle carrier from the Helios, and the footage is ready to ship. This carrier has the same footprint as a 3.5″ HDD and weighs less than 1lb to offer serious courier cost savings.
This setup allows for real read and write speeds of 2750MB/s with RAID protection. Never experience offload bottlenecks again with a U.2 NVMe storage solution as your destination drive for offloads. The M.2 drives can be set in any RAID configuration offering a data-safe solution that’s more flexible than traditional multi-hard drive disk enclosures. Once the media arrives with Video Editorial, simply install the OWC U2 Shuttle into a Helios (with the interchange system installed) or another U.2 capable system such as the Thunderbay Flex 8.
The Interface of Choice
U.2 is set to become the new drive interface of choice for manufacturers and professionals alike. Over time, traditional SATA drives will be used less and less. While M.2 drives are currently more commonly found for purchase over U.2, M.2 drives do not connect via a cable – they connect directly into a board. Also, M.2 drives were never intended for repeated install and removal like U.2 drives. That’s another area where U.2 shines. U.2 products can operate with M.2 drives in the enclosure, which offers up the best either interface has to offer!
Have an on-set data management horror story? Feeling bottlenecked with your current workflow? Do you have questions about the U.2 interchange system? Let me know in the comments below!







If the Thunderbay Flex 8 and Helios had been updated to directly support U.2 storage, AND take the place of my CalDigit T3 docks, AND provide a good home for a GPU, then I would have purchased a couple already. What doesn’t make much sense are piecemeal solutions that require too many parts, all separately powered, all connected through a tangle of cables, and all falling short of providing complete expansion solutions.
Hi Mark!,
The U2 Shuttle is compatible with the Mercury Helios and the Flex 8.
The Thunderbay Flex 8 can mount U.2 storage natively.
The Mercury Helios requires an adapter to mount the U.2 carrier.
Not sure which CalDigit interface you are making reference to, but the Thunderbay Flex does have a fair bit of ports, including USB-A, USB-C, Thunderbolt, and DisplayPort, along with a CF reader and SD card reader.
The Thunderbay Flex 8 does have a PCI lane but as you pointed out, this lane does not support a GPU. It can support 10gig/e, additional USB 3 ports, a BlackMagic Decklink, or a Pro Tools HD card. I haven’t seen any GPU expanders on the market that can do what the ThunderBay Flex 8 can do, which is mount 8 HDDs, daisy-chain an 8k display, and mount cards and hubs on top of that! I suppose there is a limit to how much a single Thunderbolt connection can pass through.
Best,
Arthur
A Thunderbolt controller in a dock or PCIe expansion box can act as a PCIe switch with the following options (excluding the downstream Thunderbolt port and the built-in USB controller):
x4
x2x2
x1x1x2
x1x1x1x1
OWC has products the use the first option (OWC Helios S3, Akitio Node Titan, etc.), second option (Akitio Node Duo) and last option (OWC Express 4M2, OWC Thunderbolt 3 Dock, etc.)
But if you want to get full x4 performance from M.2/U.2 and eGPU, then you need a box with a separate PCIe switch. Those are expensive. For example, the Sonnet Echo III Desktop or Sonnet Echo Express SE IIIe have a PCIe switch but don’t have enough power or space for a GPU.
OWC has the Thunderbay Flex 8 which has a ASMedia ASM2824 PCIe switch configured as x4 upstream (x8 max but Thunderbolt is x4) and 16 lanes downstream configured as
x4x4x4x1x1x1x1
Two of the x4 links are for PCIe slots. One link is for a x4 U.2 bay. Then there are three x1 U.2 bays and a x1 CFexpress connector.
gen 3 x4 is sufficient for most uses: a gen 1/2 x8/x16 or gen 4/5 x1/x2 PCIe card will not get their best possible Thunderbolt 3 performance but anything that is gen 1/2 x1/x2/x4 or gen 3 or gen 4/5 x4/x8/x16 will.
A product like the Flex 8 shows that OWC can make something like what you want (one box/cable/PSU for dock/eGPU/RAID combo). It would probably require a more expensive PCIe switch (for more downstream lanes), a bigger box, another USB Hub (for audio at least), PCIe Ethernet controller (preferable to USB Ethernet adapter), and a bigger power supply. OWC wouldn’t be able to get it certified as an eGPU but that doesn’t matter since anything with PCIe can be used to connect an eGPU (M.2, U.2, mPCIe, etc but I haven’t seen anyone try connecting an eGPU to a CFexpress port though). I have an eGPU currently connected using an OWC Helios S3 but it requires a PCIe riser cable and extra PSU.
Something with sufficient size and power might be like the Netstor NA255A (but you’ll want more slots – otherwise an expensive PCIe card with another PCIe switch would be required). Just need to replace the PCIe target card with a Thunderbolt target card – preferably using a JHL7440 so you get the extra USB controller/port that the Flex 8 uses for it’s USB stuff (same as the Blackmagic eGPUs or the newer Sonnet eGPUs).