 I’ve got some bad news for you; your hard drive is going to fail.
It’s not likely to be any time soon; under average conditions, most modern hard drives have a fairly long life span. I’ve got a 10-year old ATA drive at home that still spins up and works like a charm – albeit a little slowly.
The fact remains, though, that your hard drive is an electro-mechanical device and, as such, will eventually fail. This is one of the main reasons I am such a preacher of frequent data backup. If you haven’t been careful with your backups and you need to get data off of the drive, you can look forward to working with a Data Recovery Service and the associated fees.
However, if you’ve been diligent with your backups, when your drive finally goes to The Big RAID Array in the Sky, you should be able to install a new drive, restore your data, and plow on ahead. If the drive is under warranty (most drives have 3-year warranties, and the drives in OWC Enterprise-class Solutions are covered up to 5 years). If you’re past the warranty period, the replacement would, obviously, be done with a new drive.
Either way, the only thing you will have left is that old, dead hard drive.
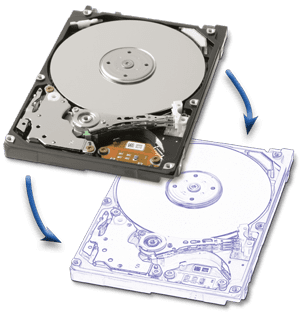
However, even though it is unable to perform its intended function, that dead hard drive still has plenty of useful parts inside. You just need to open it up.
WARNING! Opening the hard drive will not only void your drive’s warranty, it will DESTROY the drive, preventing you from EVER being able to recover the data without extreme expense. Even then, the chances for recovery are VERY slim. ONLY do this if you NEVER want to see the data on this drive again!!
All you need is a couple of Torx screwdrivers (I’ve found T-6 and T-8 to be the most common) and a larger flat-bladed one. Remove all the screws you can find on the outside (sometimes they’re hidden under labels), and you should be able to remove the top cover.
Keep the screws around; they’re decent quality, and you never know when one of them may fit a use you’d never have thought of. I’ve got a number of hard drive screws that replaced old, stripped screws in my old Wallstreet PowerBook.
Once you’re inside, you can get to the really fun parts. I’m not going to detail how to remove them, as it varies a bit between manufacturers and models, but here’s a list of some of the neat things inside.
- Platters – Those metal disks are where all the data is stored. They’ve also got very shiny surfaces. If you can get them out without smudging them with fingerprints, you can have yourself all sorts of fun for anything requiring a mirror. For a while, I had one taped to my monitor, so co-workers couldn’t sneak up on me.
- Drive Motor – These are tricky to remove, but I have a couple of these in a drawer at home. I have yet to really look into what the exact power requirements they have, but I figure a 4200-10,000 rpm motor has got to prove useful eventually!
- Magnet(s) – This is probably the most popular – and the most useful – component inside the hard drive. The rare-earth magnets used in moving the read-write arm is quite strong and, as such, can be rather useful.Here’s just a small list of uses I’ve put to these little gems.
- Holding things up in my cubicle – I have one I use for my keys, one holding up a small painting, and a couple I have “just in case”
- Holding things down at home – there’s a leak in the sunroof on my car, so I use four drive magnets to hold a tarp over the sun roof when it rains. No more leaks! I also use a pair of 2.5” drive magnets to hold the curtains closed in my TV room, to prevent glare from the neighbor’s porch light while watching movies.
- Screw Retrieval – There have been a number of times, while taking a computer apart, that I’ve dropped a screw on the patterned carpet here. All I needed to do was wave one of these drive magnets over the area it seemed to have dropped on, and I had the screw back within a matter of moments.
- Tool Kit Enhancements – With the original NewerTech Screwdriver Kit, I taped one of these to the inside of the plastic case. I used it to magnetize/demagnetize the screwdriver heads, hold screws I removed, and when I was done, used it to stick the whole thing to the side of my file cabinet. With the new, 11-piece kit I retained much of the same functionality with a magnet from a 2.5” drive. As soon as I get around to stitching it to the outer case, I’ll be back to where I was before.
As for any of the other gaskets, connections, and other pieces, I will leave it up to your imagination (and possibly a trip to Make and/or Instructables) to come up with uses for those.
Of course, once you’re all done stripping your drive for parts, you should responsibly recycle the remaining pieces.
While complete hard drive failure is never a pleasant experience, at least you can offset the tragedy with the acquisistion of some entertaining and/or useful accessories.


Take care with the platters — they are not always made of metal! Some are made of a thin ceramic material that can shatter into thousands of tiny sharp fragments if not handled carefully.
I am having a PC with dual core processor, 512 GB Hard disk and 2 GB RAM configuration. So any one can help me out how can i do the hard drive recycling?
Recycling is very very important in order to preserve mother earth.
While your warning should certainly be heeded back in the day I used to open SCSI drives when the read/write arm would get stuck off platter. By forcing the arm onto the platter and applying power I was able to recover data and in some cases button up the drive and use it for months after. Of course I knew that this was risky and only did it on drives that were goners anyway. I’ve tried it on a few dead drives now a days but it doesn’t seem to work anymore.