In my previous post, Making Music During a Pandemic, I shared how the students I teach at Cudahy Middle School in Cudahy, WI, use technology to hold virtual performances. Today I want to talk about workflow. More specifically, our audio production workflow.
It Starts With a Vision
As with any project, it’s essential to have a vision. Once you have your end goal in mind, you need to create a step-by-step process to obtain it. Each step in the process requires a very specific workflow.
In the school band world, I’ve read many comments describing virtual performance creation as too laborious and too time-consuming an endeavor. This may be true to some extent. However, I have found that using a consistent process and workflow makes it far less daunting than it appears.
Audio Production Workflow
- Video collection and processing
- Audio export
- Audio import and alignment
- Clip processing and editing
- Mixdown and Bounce
Video collection
Video collection and organization is quite simple in my classroom. Students record themselves using their Chromebooks and an app called Screencastify. They are provided a link to use when recording. When students submit their video, it’s saved directly to a project folder in Google Drive as an mp4 file.

After downloading the videos, I like to batch process them in Apple Compressor. Using a preset I’ve created, all videos are processed so that they have the same settings. This is particularly important if you have videos coming in from a number of different sources, such as various cell phones or video recording devices. Batch processing is not as crucial in my case, as most videos are coming from Screencastify via Chromebooks, but I still prefer to use this step. Processing the videos in a compressor enables my Mac to render the videos much quicker and run much cooler.
Once the videos are all processed, I need to export the audio portion of the video. (In cases where students have recorded in the CEMES studio, I can skip this process, as they recorded their audio directly into Logic.) The easiest and quickest way to accomplish this is with Quicktime, which allows you to export the audio to a .mp4a file. Note: Although you can import the video directly into Logic, the video is then treated differently and not as easy to work with. I also find that organization to be extremely important throughout this process. I’m careful to keep exported audio files in one folder while separating videos that have already had the audio exported into their own folder.
Audio Export
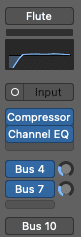
Time to get the audio files into Logic. To conserve time, I start with a Logic Template that I’ve created. This has all the settings that I like to work with built in. The template is programmed with tracks set to the Channel Strip settings that I like to use. These include Channel EQ, Compressor, and sometimes a Gate. Some tracks may require other settings, but this is a good start.
Audio import and alignment
Two things greatly aid the process of lining up the audio clips. The first is the Sync Tones that were built into the reference track. The image below shows how the sound wave created by the Sync Tone makes it really easy to get things lined up. The second is disabling “Snap To Grid” in the Snap menu. With a little practice, you can get pretty quick at lining things up by soloing tracks and looking closely at the wave file shapes.
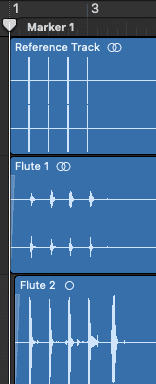
Once all the clips are imported to Logic and lined up correctly, it’s time to do a little processing and cleanup. At this point, I’ll trim the reference track so that the only audible portion is the Sync tones at the beginning. This will be important when it comes time to line up the videos in Final Cut Pro X.
Clip processing and editing
Since the beginning of the Pandemic, my wife and I have done a great deal of audio and video editing for our church. We often reference the “rabbit hole” of the editing process. With the immense capabilities built into both Logic and FCPX, it’s easy to slip into the hole and, before you know it, you’ve spent an hour editing one little segment.
This is where perspective is very important. In my case, I’m mixing middle school band recordings. Sure, if I wanted to, I could spend hours editing to make them sound like professionals. But is that really the point? I say no. So I keep it simple.
Channel Strip Plugins Used
- Channel EQ
- Low Shelf to remove unwanted low frequency “mud”
- Minor frequency cuts to remove residuals from the student recording spaces
- Minor frequency adjustments to “sweeten” the instrument tone
- Compressor
- Used to boost the output signal as well as control any transients
- Noise Gate
- Set as tightly as possible to remove any background noise in the track
- Reverb
- I add only a small amount, and typically do it on the Bus Mix for each section
I save a lot of time by starting from a Logic template that I’ve created. Only a few quick, minor adjustments are needed for each track — primarily on tracks that were not recorded in the CEMES. I also do some minor pitch correction using the Flex Pitch feature in Logic. In addition to the Gating, I often trim the clips to eliminate any large sections where the students aren’t playing. A small fade is added at the beginning and end of every clip. The image below shows what this looks like.
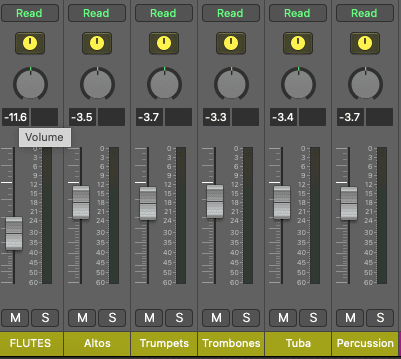
As far as getting the ideal mix… I like to keep this as simple as possible. I’ll solo all the instruments in a section, then loop a section and adjust the track faders to get a good blend of the tracks. Next, I assign each of the tracks in an instrument group to a single Bus Mix, so that I can adjust that entire section later with a single fader. I’ll also apply a small amount of reverb at the bus mix using one of the Apple plugins, or a favorite third party plugin like Izotope Neoverb. Caution: Plugins are another very dangerous (and expensive) rabbit hole. Rinse, lather, and repeat on each section.
Mixdown and Bounce
With each section individually balanced, I listen through the whole piece and use the bus faders to get an overall mix. Depending on the complexity of the piece, I’ll add some automation to the Bus faders by putting them in Latch Mode and adjusting them during playback.
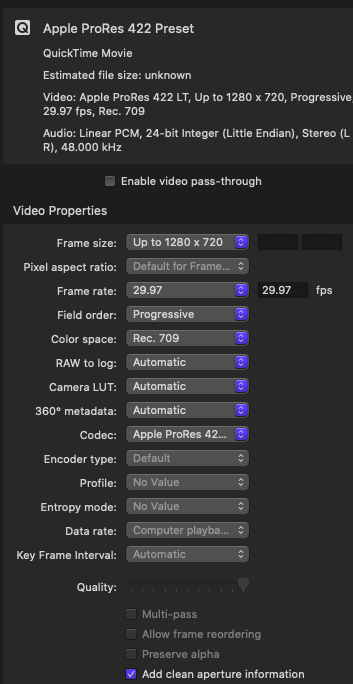
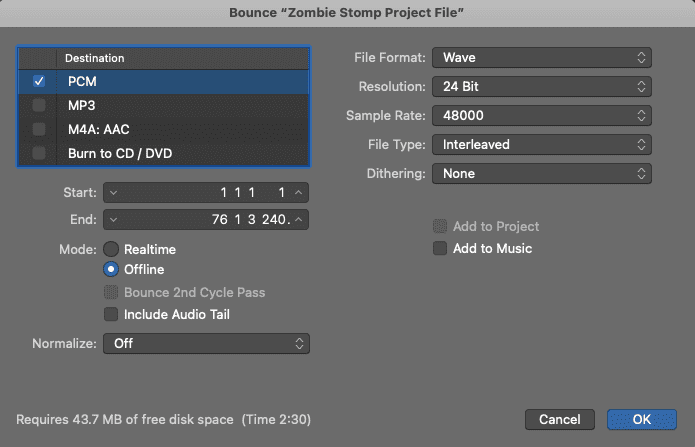
Once the mix is complete it’s time to “Bounce” the audio. I prefer a Wave file at 24-bit resolution and a 48000 Sample Rate. I also turn off the “Normalize” option.
One optional last step I sometimes use is to master the recording using Izotope’s Ozone 9.
And that’s it! While it looks like a lot, time and practice have made me pretty efficient. The part of the process that I enjoy the most is discovering new tricks, whether it be through trial and error, visiting the “School of Youtube”, or picking the brain of one of my incredibly knowledgable friends, who are always willing to share their expertise.