Depending on your preferences, a crowded bar can be a good thing. It can spark new connections with other patrons. It can also be a place where you can share merriment and blow off some steam at the end of a long week. But a crowded bar isn’t so great if the bar in question is your Mac’s menu bar.
If you use your Mac with any regularity, it’s not a question of “if”, but rather “when” your Mac’s menu bar items start to feel a bit too crowded.
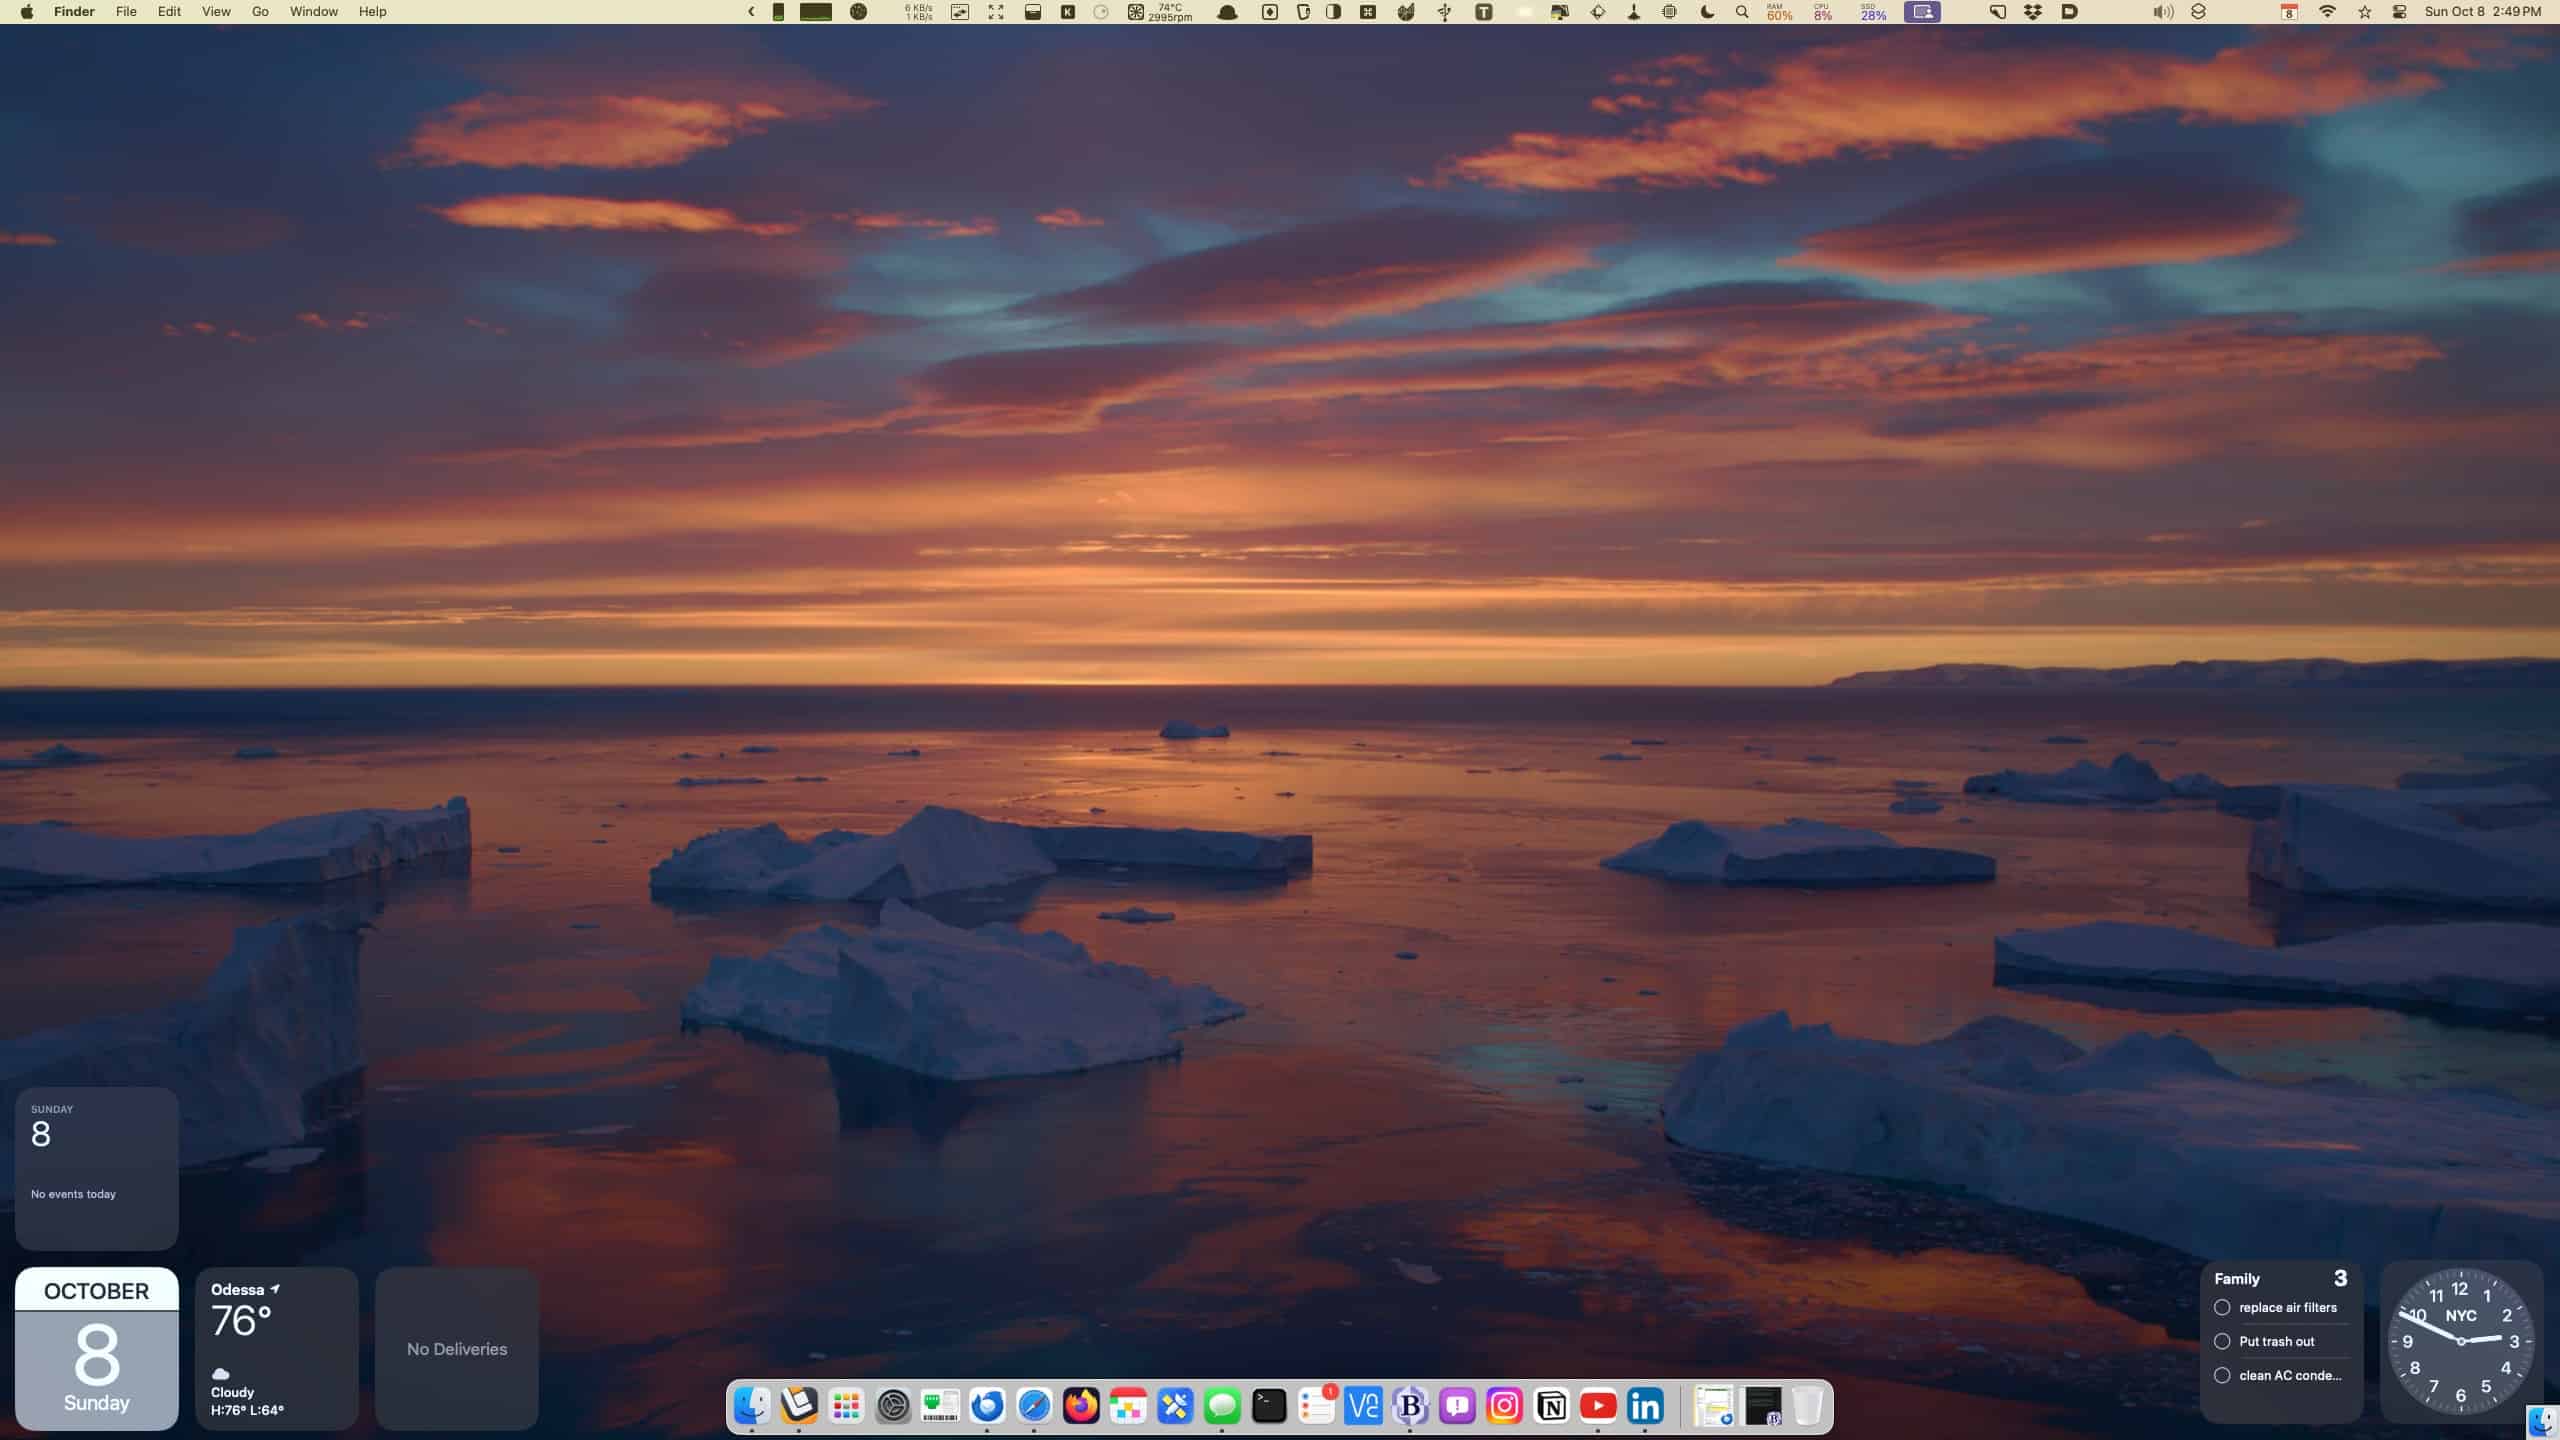
Fortunately for Mac aficionados, there are several third party solutions to help tame your Mac’s menu bar clutter. Chief among them is Bartender, now at version 5.
For more than a decade, Bartender has provided users control over their menu bar items. Bartender does this by giving users the ability to specify which menu bar items are shown, and which remain hidden. After you first install Bartender, by default, the app will hide all menu bar items except for the Control Center icon and the Siri icon (if you have the Siri icon enabled in your menu bar).
To view the hidden items in the menu bar, you can:
- Click an empty space of the menu bar
- Click the … icon in the menu bar
- Position your mouse cursor over the menu bar and then perform a left-to-right or up-to-down two finger swipe.
To choose which items are hidden, you’ll need to open Bartender 5’s preferences, click Menu Bar Items and select which items are always shown in the menu bar, which items are hidden but revealable via the actions above,and which items are always hidden—items that don’t appear even when you ask Bartender to show you your full customized menu bar.
With Bartender, users can also assign custom keyboard shortcuts to bring a menu bar item to view. These features have gone from being nice to being almost a necessity, especially if you are using a portable Mac that has a notch in its display.
Bartender Bar: A Menu Bar for Your Menu Bar
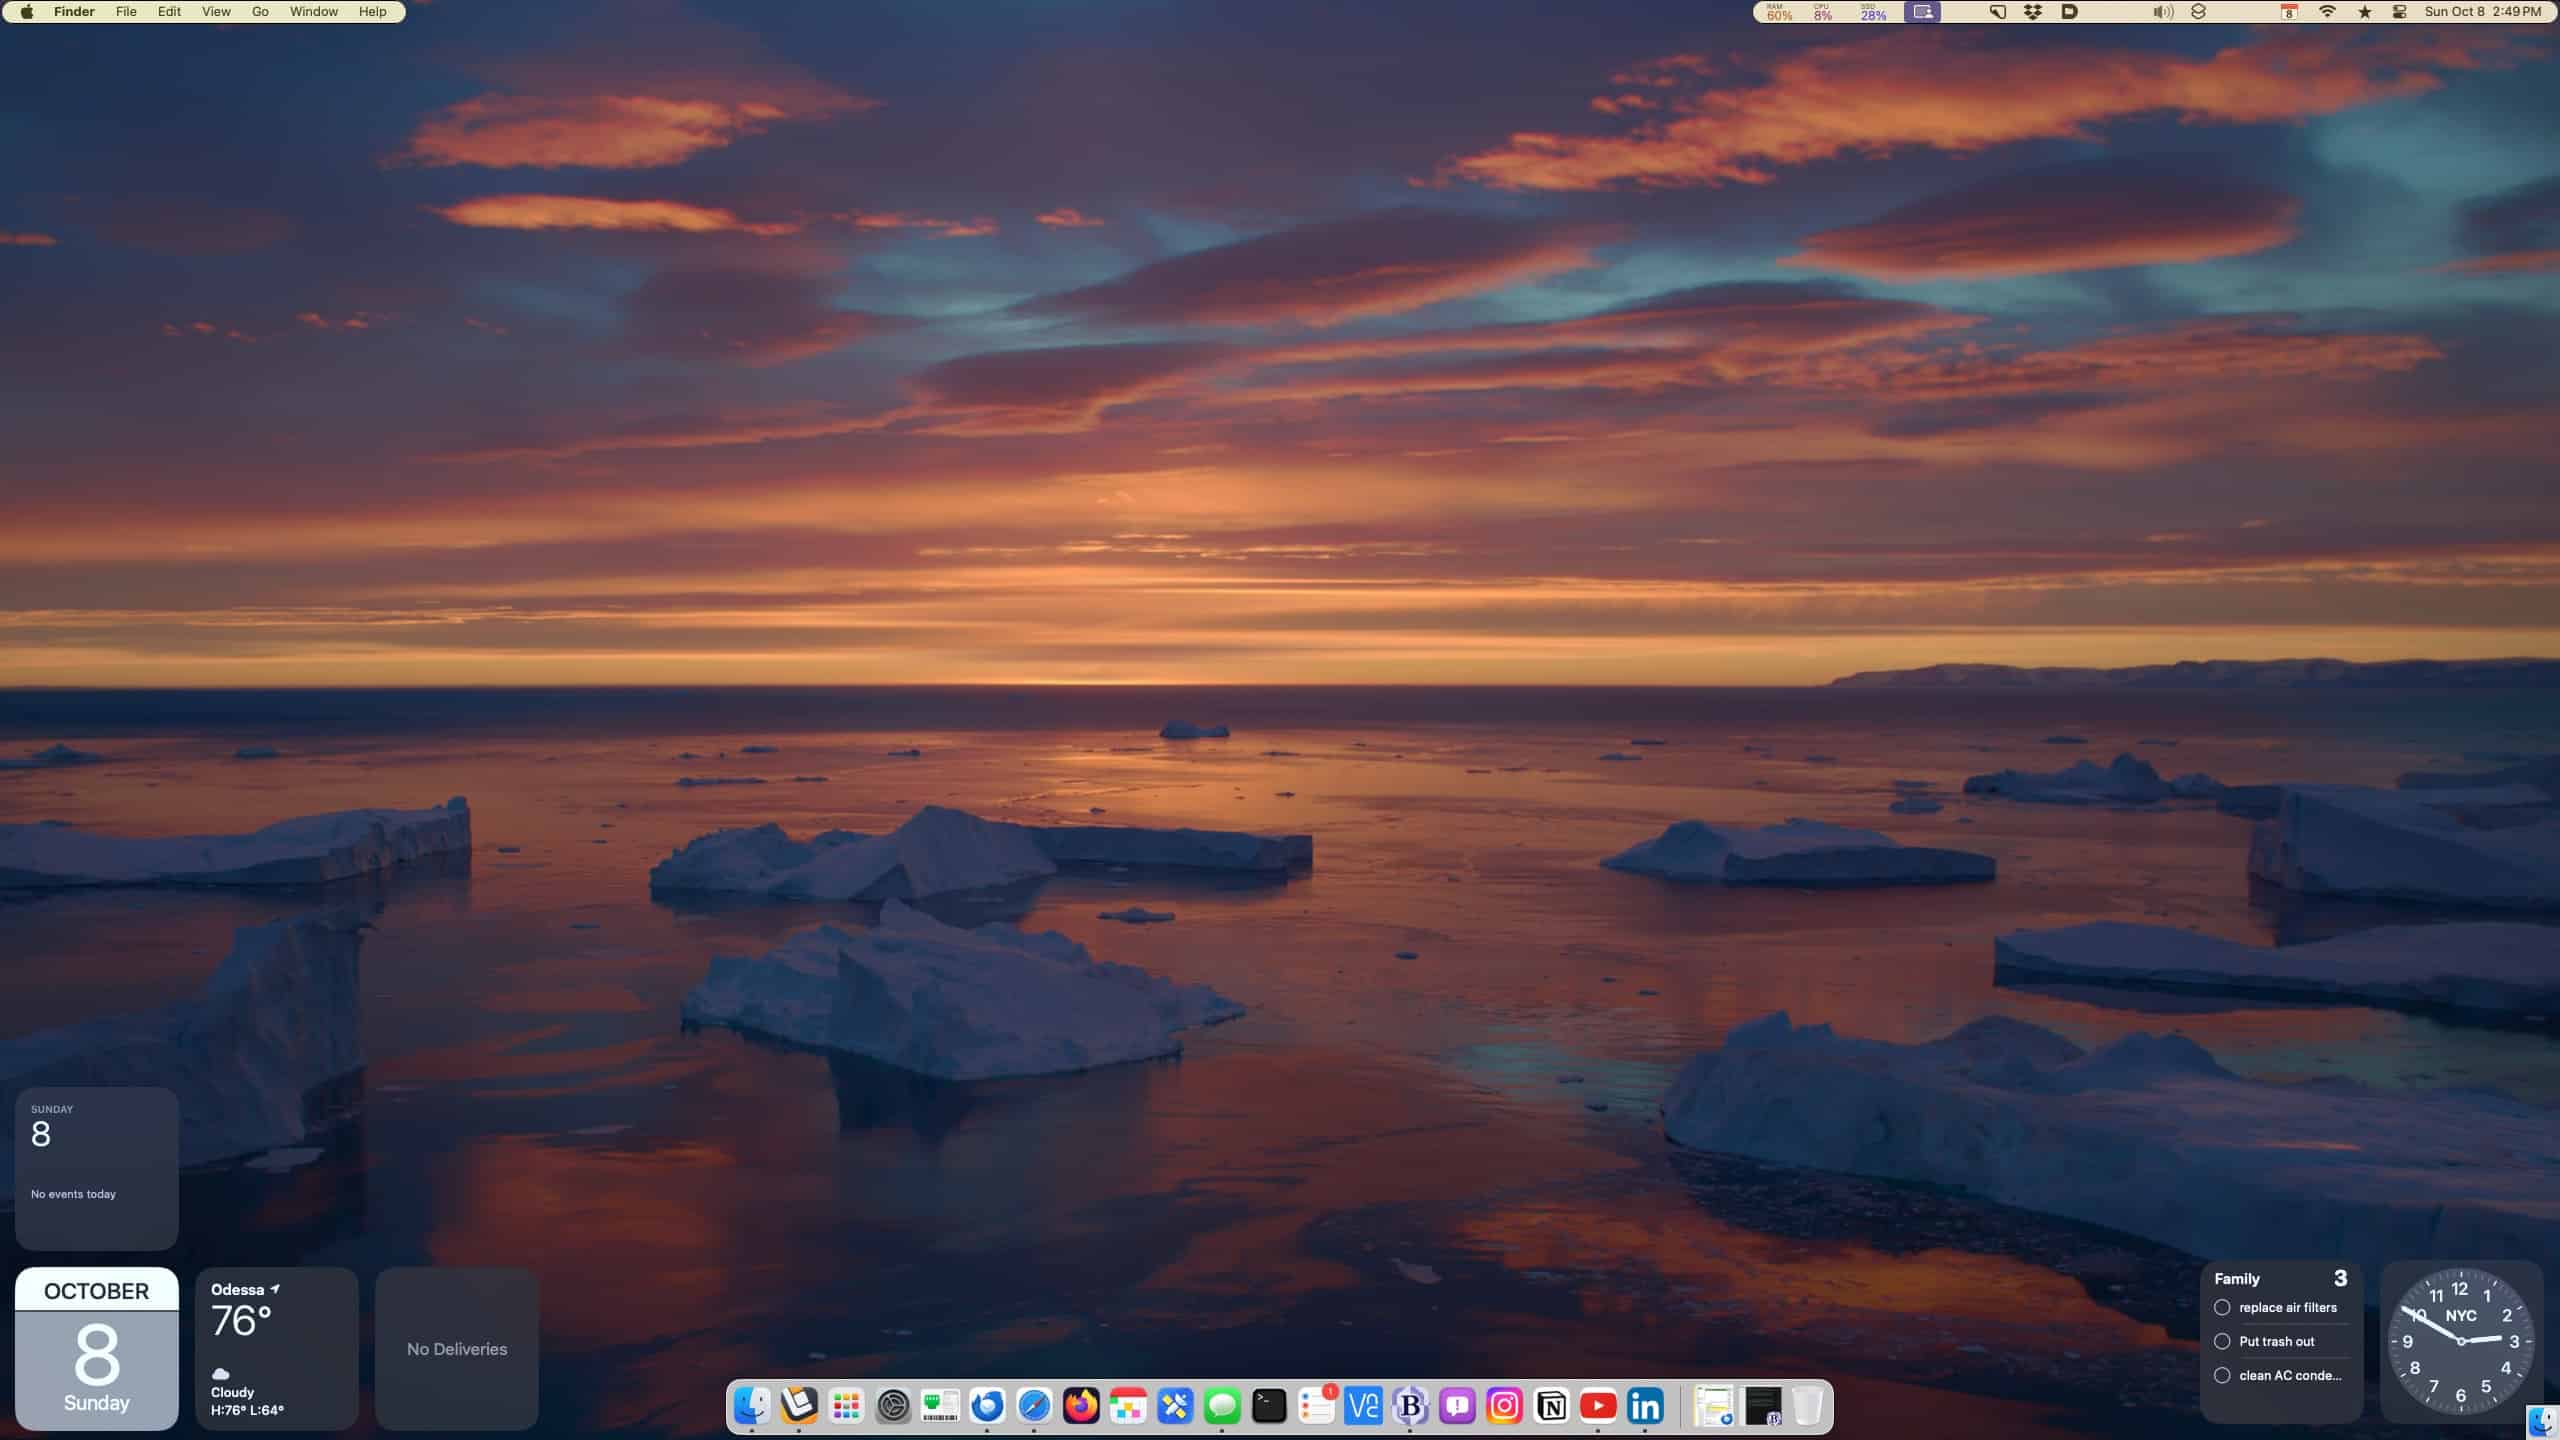
Bartender not only lets you view your menu bar items, it can also tuck your hidden menu bar items into the Bartender Bar, which lives out of sight beneath your main menu bar. You’ll need to open Bartender 5 and enable the Bartender Bar. But once you have, you can simply hover your cursor over the main menu bar (or click the menu bar) to see it. And, as mentioned before, if you’d rather never see a menu bar item, you can completely hide it through Bartender’s settings.

Menu Bar Search
As great as menu bar items are, they have one big problem (besides the clutter, that is.) After staring at a slew of menu bar items, it can be difficult to differentiate the menu bar item you want by icon alone. Thankfully, starting with Bartender 4, menu bar item search was added. And what if you don’t remember what the menu bar item’s icon looked like? No problem! Type in the first few letters using Bartender’s search bar, and your menu bar item is served to you, lick-ity split.
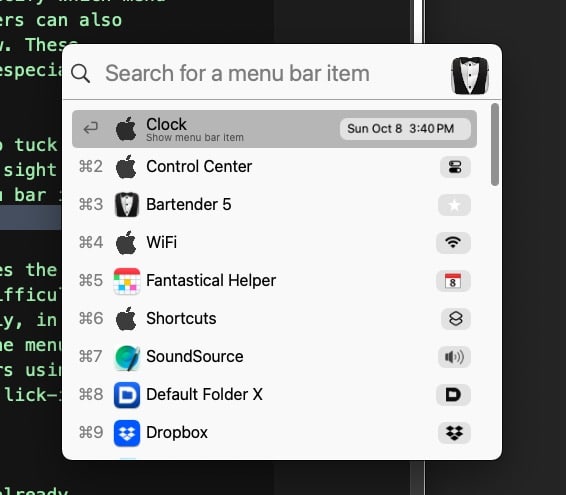
Bartender 5 ups the game even more. In addition to the features already mentioned, users can now hover their cursor over the menu bar to automatically reveal hidden menu bar items (no more clicking!). This makes for even faster access to your menu bar items.
Must-have features in Bartender 5
Groups
There are three killer features in Bartender 5. The first is Groups. For example, if you deal with multiple cloud based storage (i.e. iCloud, Google Drive, OneDrive, Dropbox, etc.), you can group them all into one group. Click on the group, and you will see all of your cloud based storage menu items in one handy location.
Presets
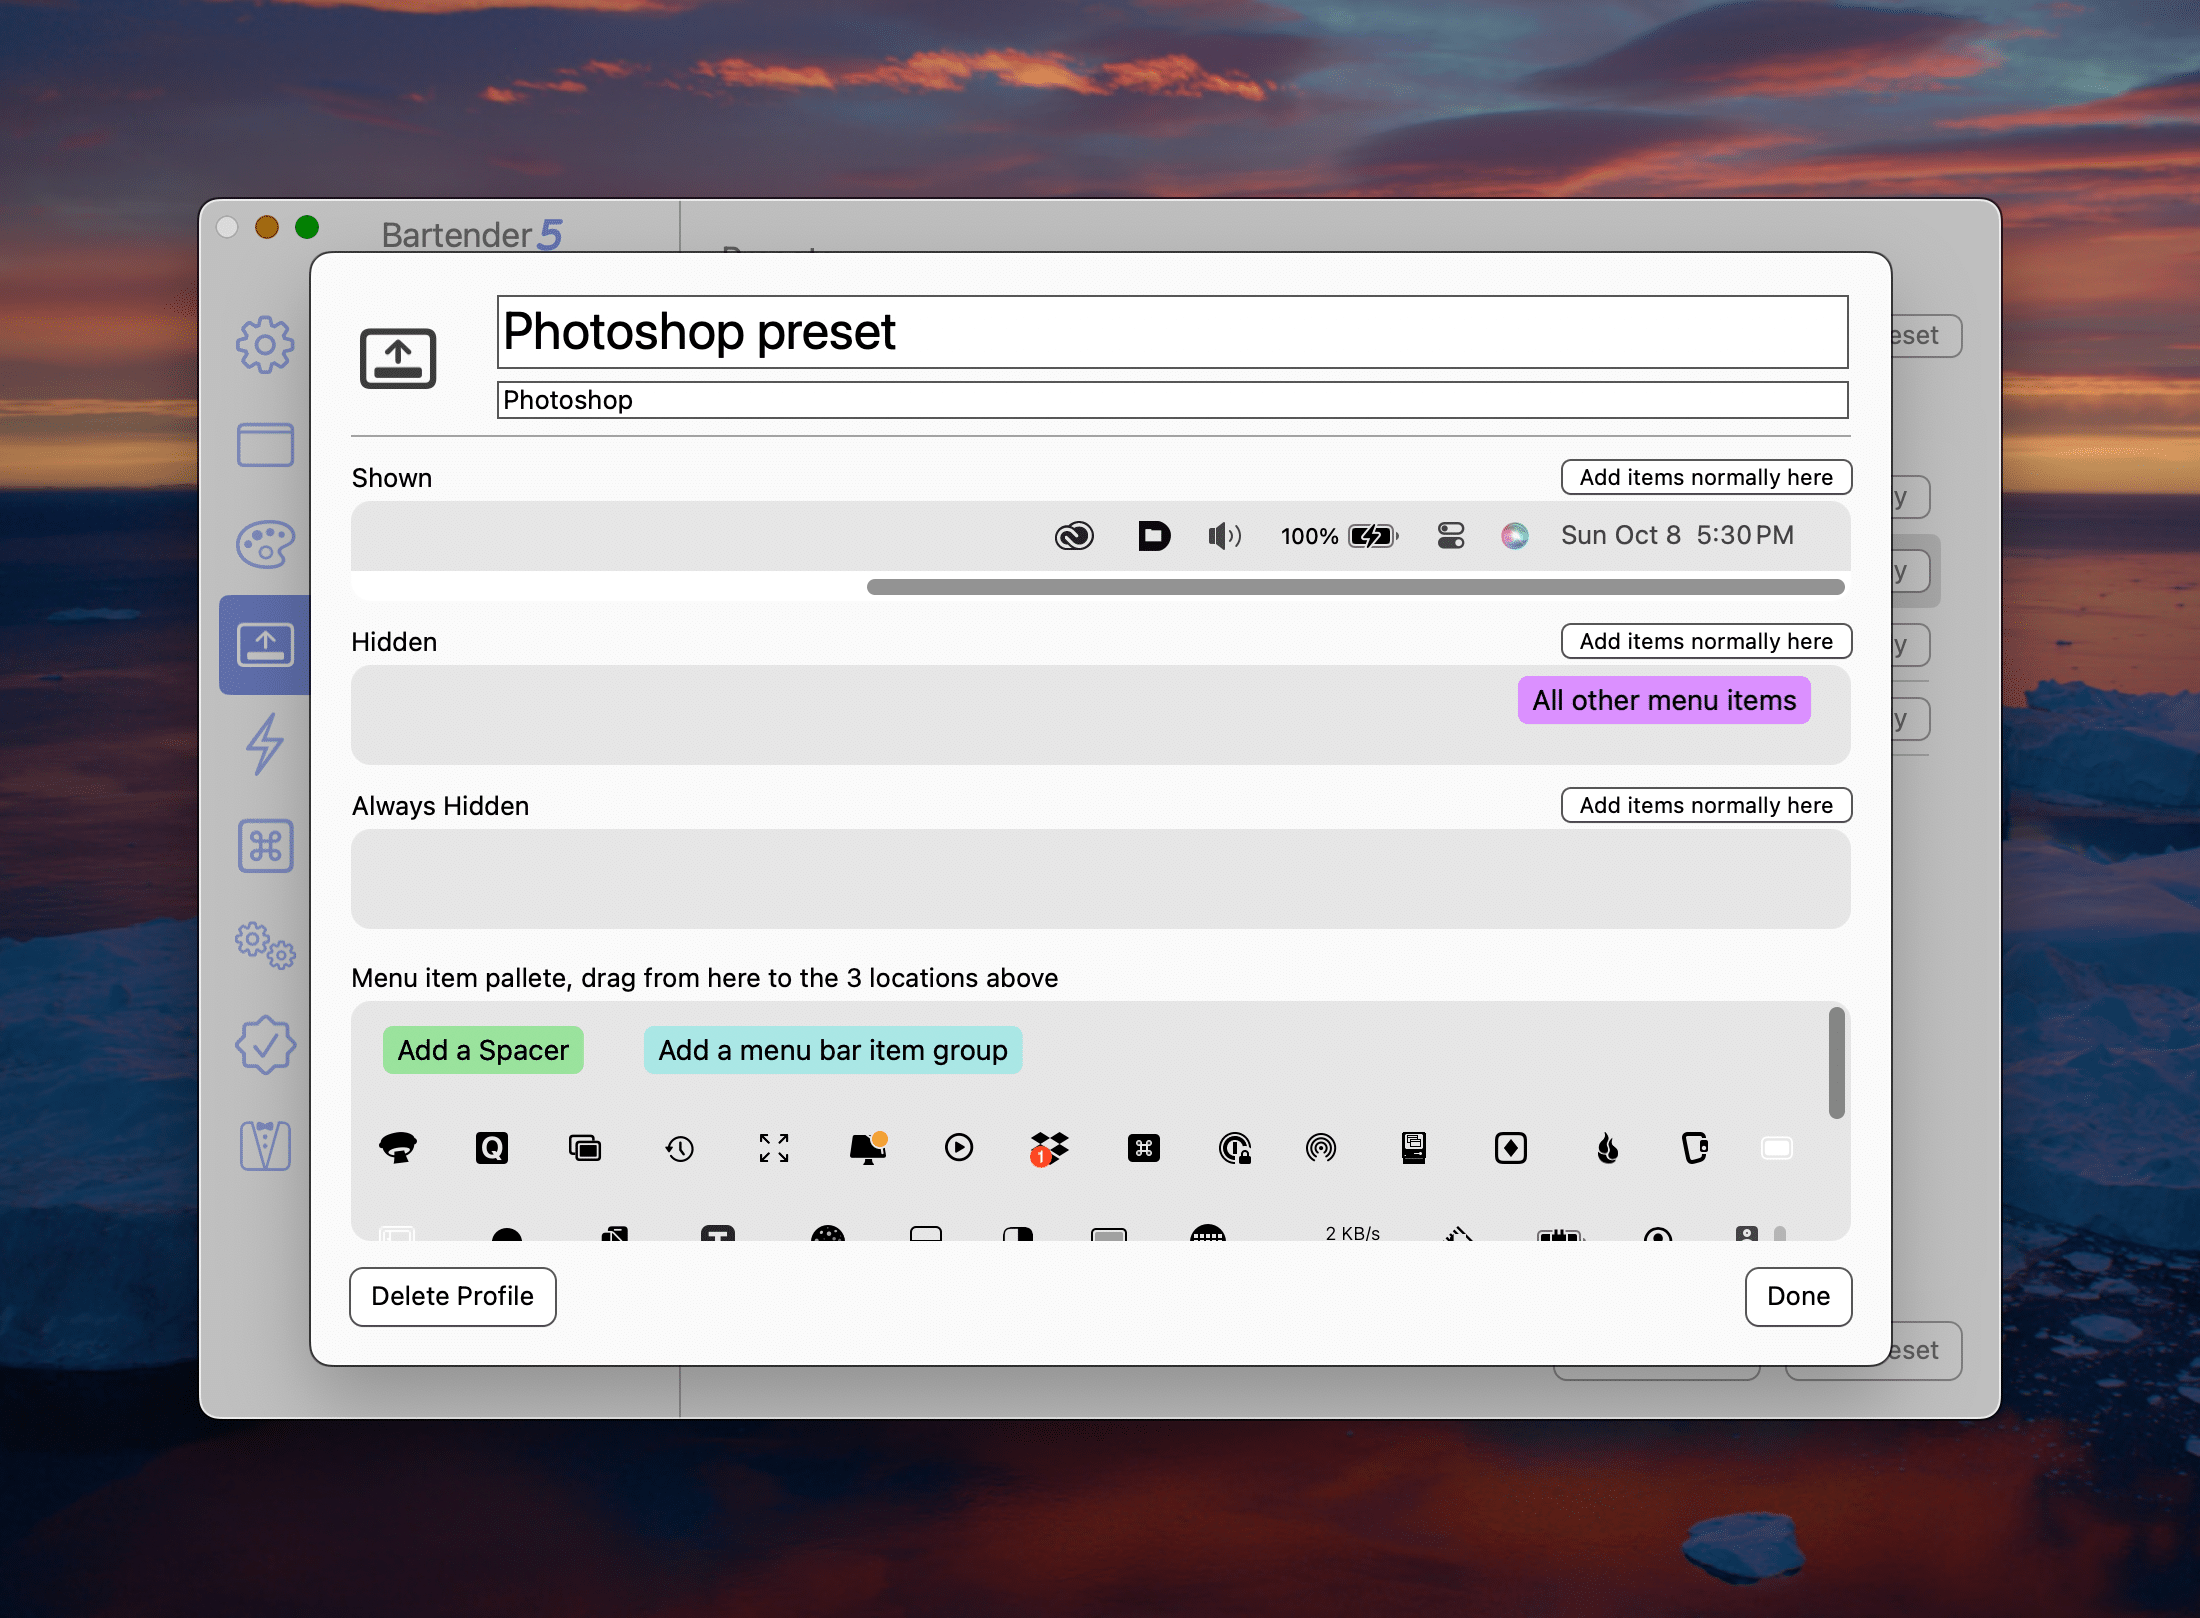
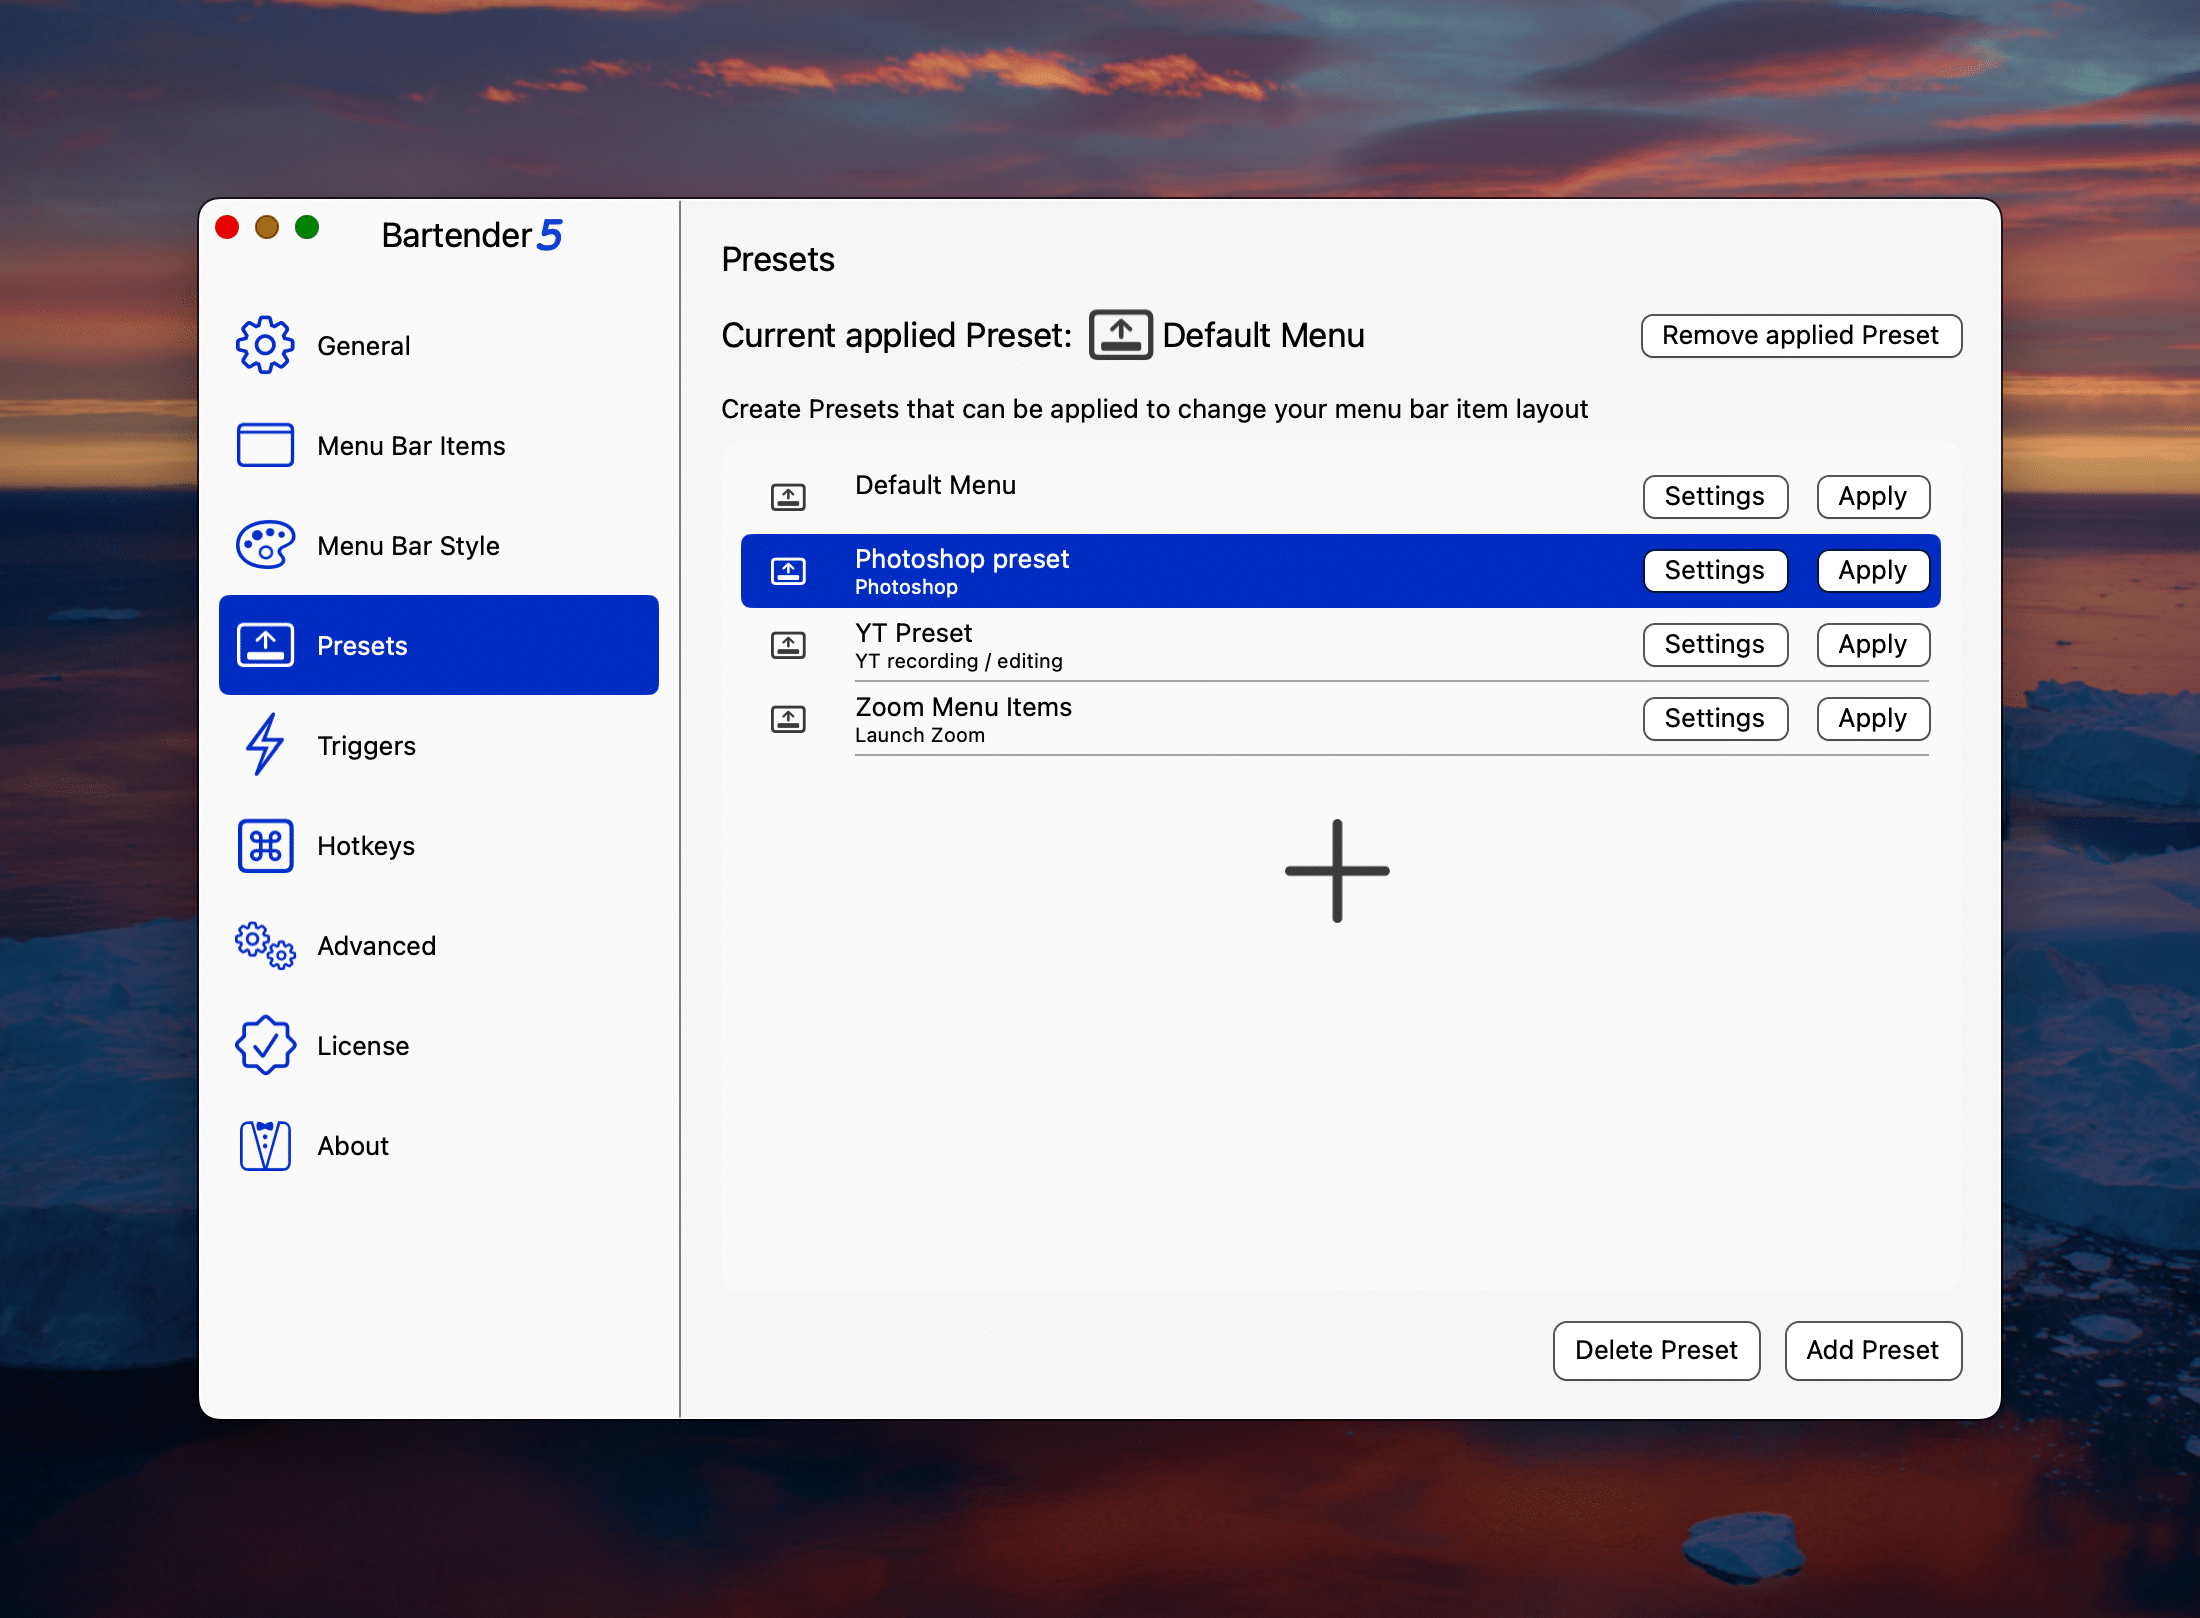
The second killer feature is Presets. Let’s say you’re on a Zoom meeting, and you only want to have your calendar and audio controls visible. You can do that. Or if you are screen recording, you can assign a preset that hides your calendar appointments.
Triggers
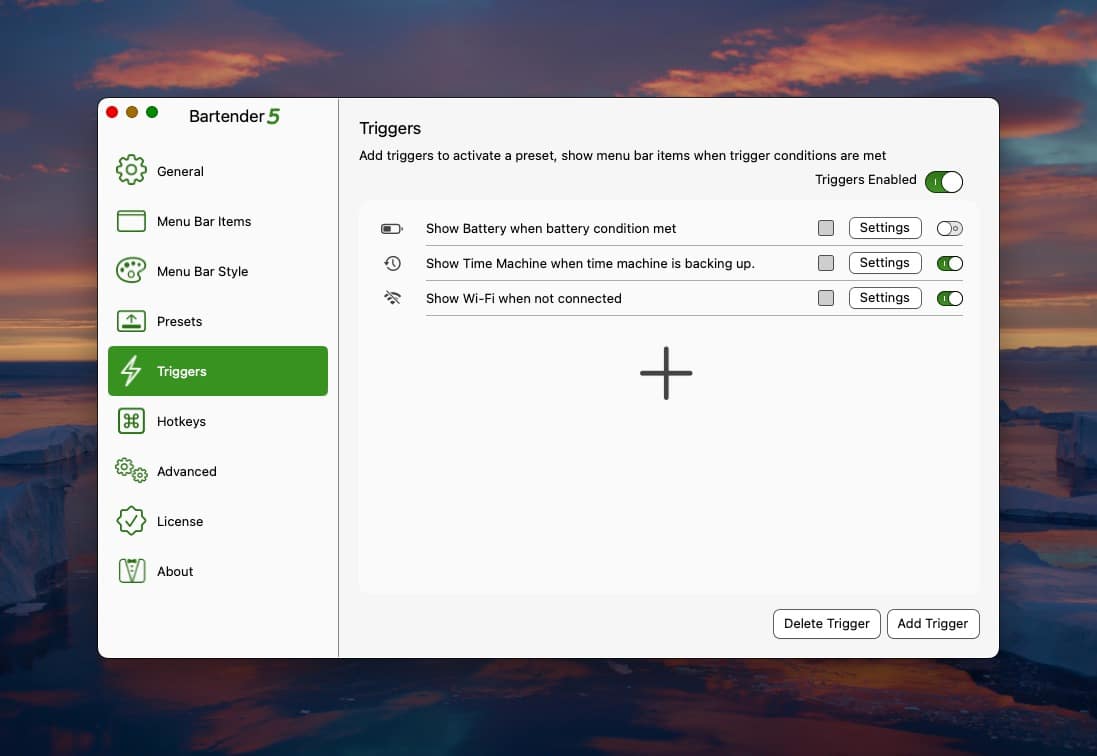
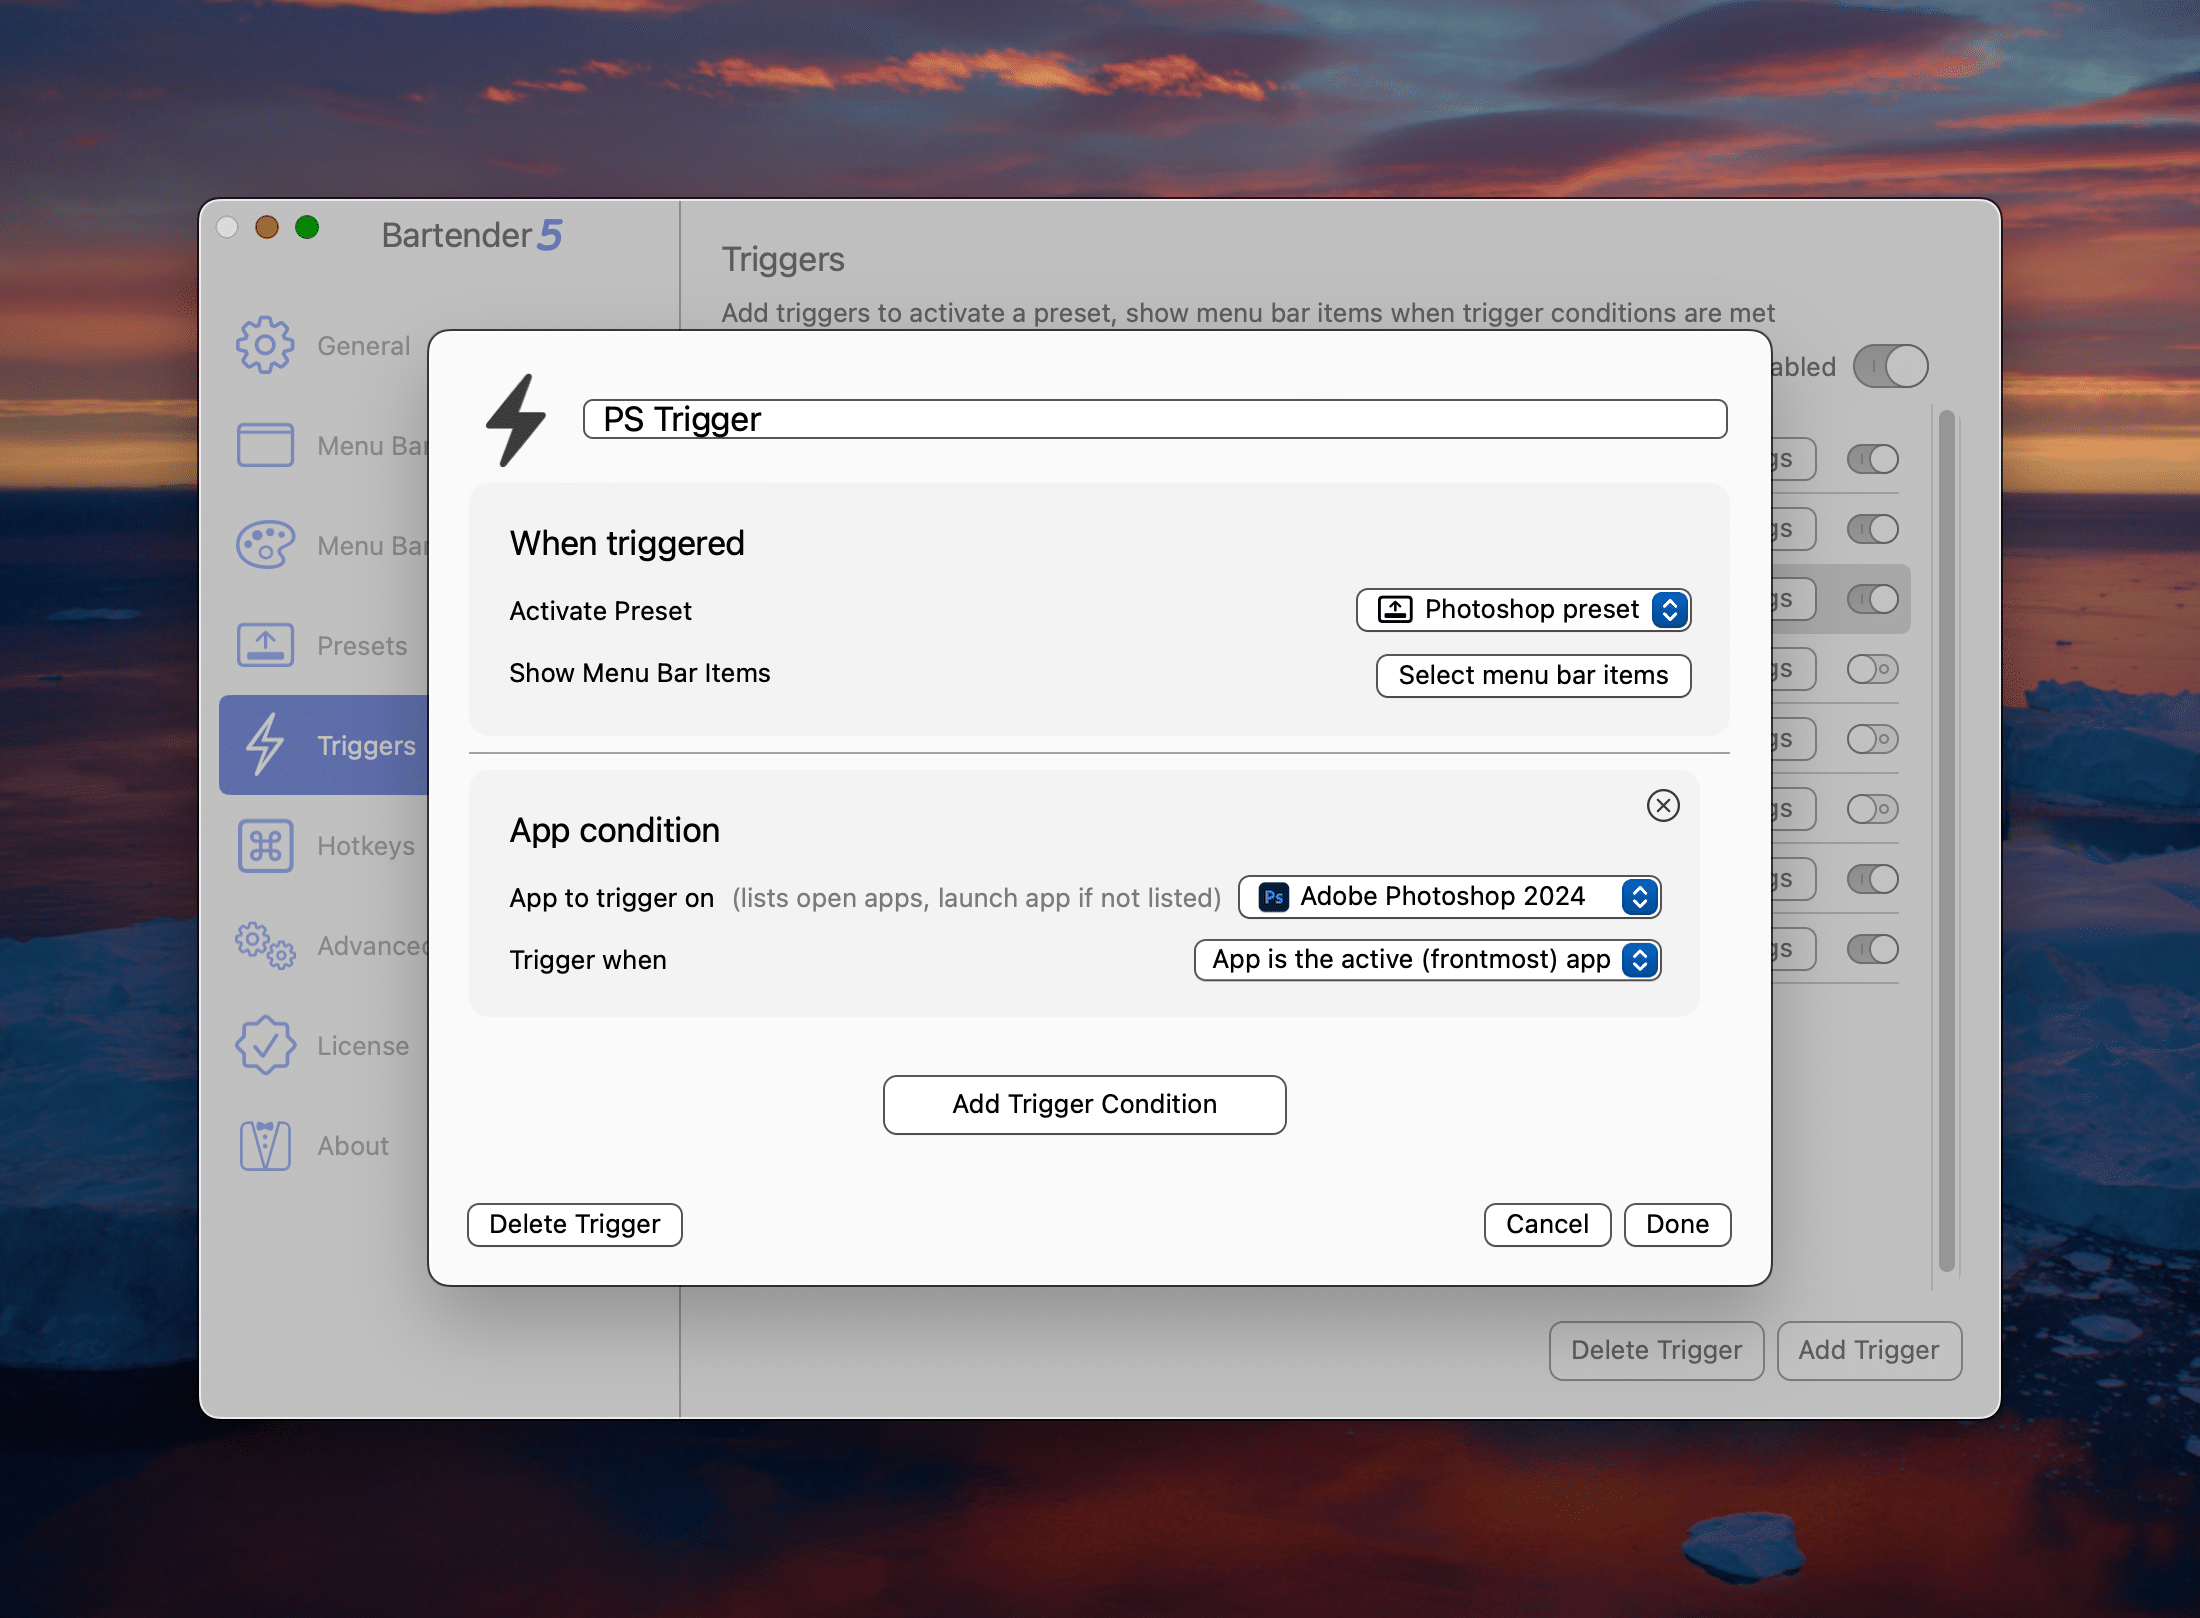
The final killer feature in Bartender 5 is Triggers. With it, you can create simple rules that control which set of menu bar items are visible on your Mac. You can, for example, activate a Bartender Trigger to show a specific Bartender Preset when you launch Zoom. You can create another Trigger that will revert your menu bar Preset back to normal when you leave the Zoom call.
Customize the look of your menu bar
These features alone make Bartender 5 very enticing. There’s more, of course, like having the ability to customize the spacing between your menu bar items. For instance, adding space to your menu bar items gives more breathing room between them. This, in turn, makes it easier to find the menu bar item you are looking for. You can now select between “Normal Spacing”, “Small Spacing” or “No Spacing”.
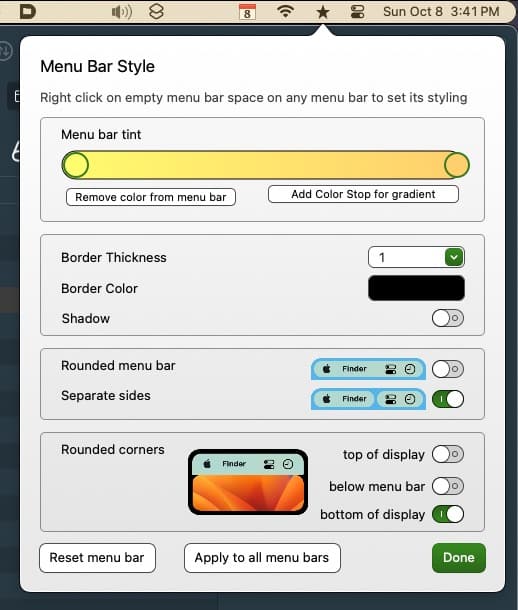
If you like to customize the look of your Mac, Bartender 5 gives you some goodies. With Bartender 5, users can customize the color of the menu bar by making it a solid color or a fancy gradient. Users can also specify the menu bar’s border thickness, border color, and toggle the visibility of the shadow underneath the main menu bar.
Wanted rounded menu bar corners? Bartender 5 lets Mac users round off their Mac’s menu bar. If that’s not enough, you can also add rounded corners to the top and bottom of the display. And if you really want to show off, Bartender 5 gives your Mac’s menu bar a rounded “pill” look, which creates visible gap between your Mac application’s pull down menus and your Mac’s menu bar items.
Promised soon are Menu Bar Widgets, where users can create their own custom menu bar items that trigger any action you want, without learning how to code. And if you like to code, Bartender 5 supports AppleScript.
All in all, Bartender 5 is a really solid release. As a long-time Bartender user, I have found incredible value with the new Trigger and Presets options. It’s a game-changer for power users.
Bartender 5 retails for $16US, and comes with a generous free 4 week trial to see if it’s the right fit for you. One license will allow you to run Bartender on all the Macs you own and use as the main user. Bear in mind, Bartender 5 works only with macOS Sonoma. If you are driving an older macOS, Bartender 4 may be what you need.
Owners of the previous version can purchase an upgrade to version 5 for $8US. A Mega Supporter option, which unlocks free, lifetime upgrades to Bartender, is also available for both new users and upgraders. (Honestly, I prefer this payment model over recurring subscriptions, and hope that more independent developers will follow suit.)
After using Bartender for 2 weeks now, I can’t live without it. It was already part of my main Mac software arsenal, but with the new features that version 5 brings, it’s become indispensable. And with that review, I’ll pour another round and close out my browser tab. Cheers!


