

Merry Christmas! Today we begin a new 12-day series called The Twelve Days of Backups. Fortunately, you won’t be getting partridges in pear trees or seven swans a-swimming from us. Instead, you’ll get great advice on how to back up your Apple devices. Particularly if you’re new to the Mac, iPhone or iPad, you may not know how to back up your device. We’re here to fix that! Today, we’ll talk about the backup application built into macOS: Time Machine.
Why do I need to do backups?
Perhaps you’ve never backed up a device and don’t even know what we’re talking about. A backup is a copy of files on your main device. If your Mac hard drive fails and you don’t have some sort of backup, you’ll lose everything on that computer. Likewise, backups of your mobile devices (iPhone and iPad) are critical as well, since there is so much personal information on them. They’re packed with music, photos, videos, contacts, calendars, and even game status and scores.
OWC is bullish on backups. We know how costly it can be to recreate data that’s been lost, so we remind Rocket Yard readers frequently of the importance of making regular backups.
What is Time Machine?
Time Machine is the Mac’s built-in backup mechanism. It has been part of macOS since Mac OS X 10.5 Leopard, and it really revolutionized both backing up computers and restoring files.
Apple designed Time Machine to be as easy as possible to use so that everyone would do backups. It works so well that Apple has made very few changes to Time Machine since it first appeared. With macOS Big Sur, Time Machine received the ability to support backups of Apple File System (APFS) volumes. This not only brought Time Machine up to the default disk file system, but also allowed backups to be faster, more compact, and more reliable.
Backup drive requirements
All you need to run Time Machine on your Mac is an external or network-attached storage device. These can be any of the following:
- A drive or partition connected directly to the Mac, either internally or externally via Thunderbolt or USB. The drive must be formatted as APFS or journaled HFS+. If you don’t know what those acronyms mean, don’t worry—if the format isn’t correct, Time Machine prompts you to reformat the drive.
- A folder on another Mac on your network.
- A drive shared by an Apple Time Capsule (no longer available from Apple) on the same network.
- A drive connected to an Apple AirPort Extreme 802.11ac model on the same network (no longer available from Apple)
- Local network volumes connected using Apple Filing Protocol (AFP) or via an SMB3 share.
Unsupported solutions
The storage devices listed above are officially supported. Some unsupported solutions also exist, allowing Linux and FreeBSD servers and network-attached storage (NAS) systems to connect to Macs running Time Machine. For those who need to copy files from a Time Machine backup to a Windows machine, there is a utility called “HFS+ for Windows” to pull those files from HFS+ formatted backup drives. For the more up-to-date APFS formatted drives, the same company sells the “APFS for Windows” utility.
External drives are inexpensive insurance
If you’re put off by the thought of having to purchase an external drive for backups, don’t be! They’re actually not that expensive compared to the possible cost of losing access to your information… forever.
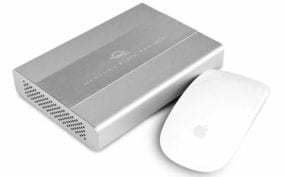
For example, let’s say you have a new 14-inch MacBook Pro with 512GB of fast SSD storage. A rule of thumb is to choose a backup drive that’s at least two to three times the size of the drive being backed up. For your 512GB SSD, that would mean a 1TB (terabyte) or larger drive. OWC’s Mercury Elite Pro mini is available in 1TB capacity starting at $109!
Setting up and running Time Machine
Many external drives are pre-formatted for Mac in the older HFS+ file system. Connect one of these drives to your Mac and Time Machine automatically assumes that you’re going to use it for backups. Time Machine launches, asks if you wish to back up your Mac to the drive, and then takes over from there.
For newer drives formatted in APFS, you need to take charge. Connect the drive to your Mac, then launch System Preferences. Click the Time Machine button on the System Preferences window:
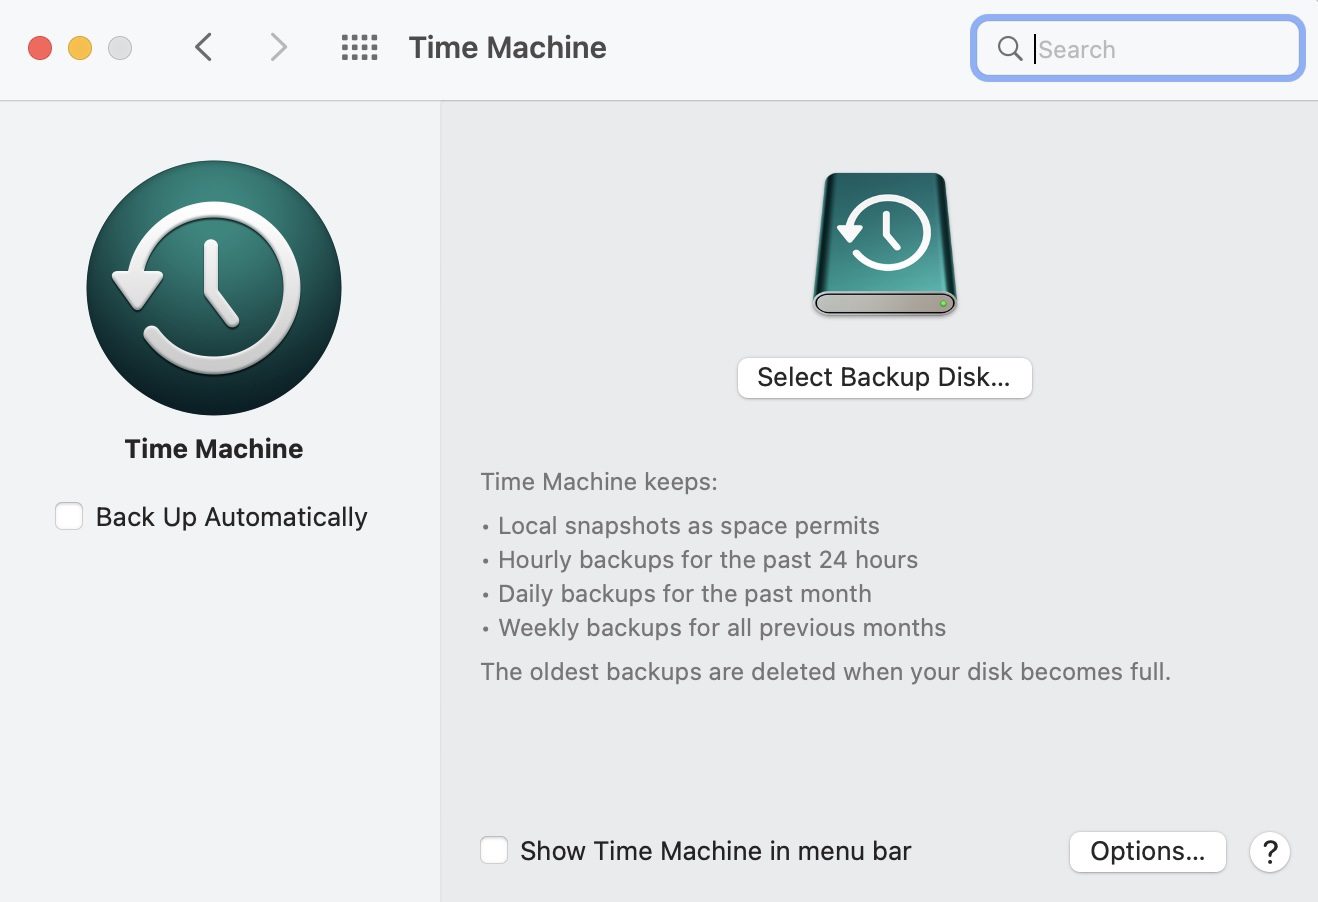
Click the Select Backup Disk… button to display a list of possible backup volumes:
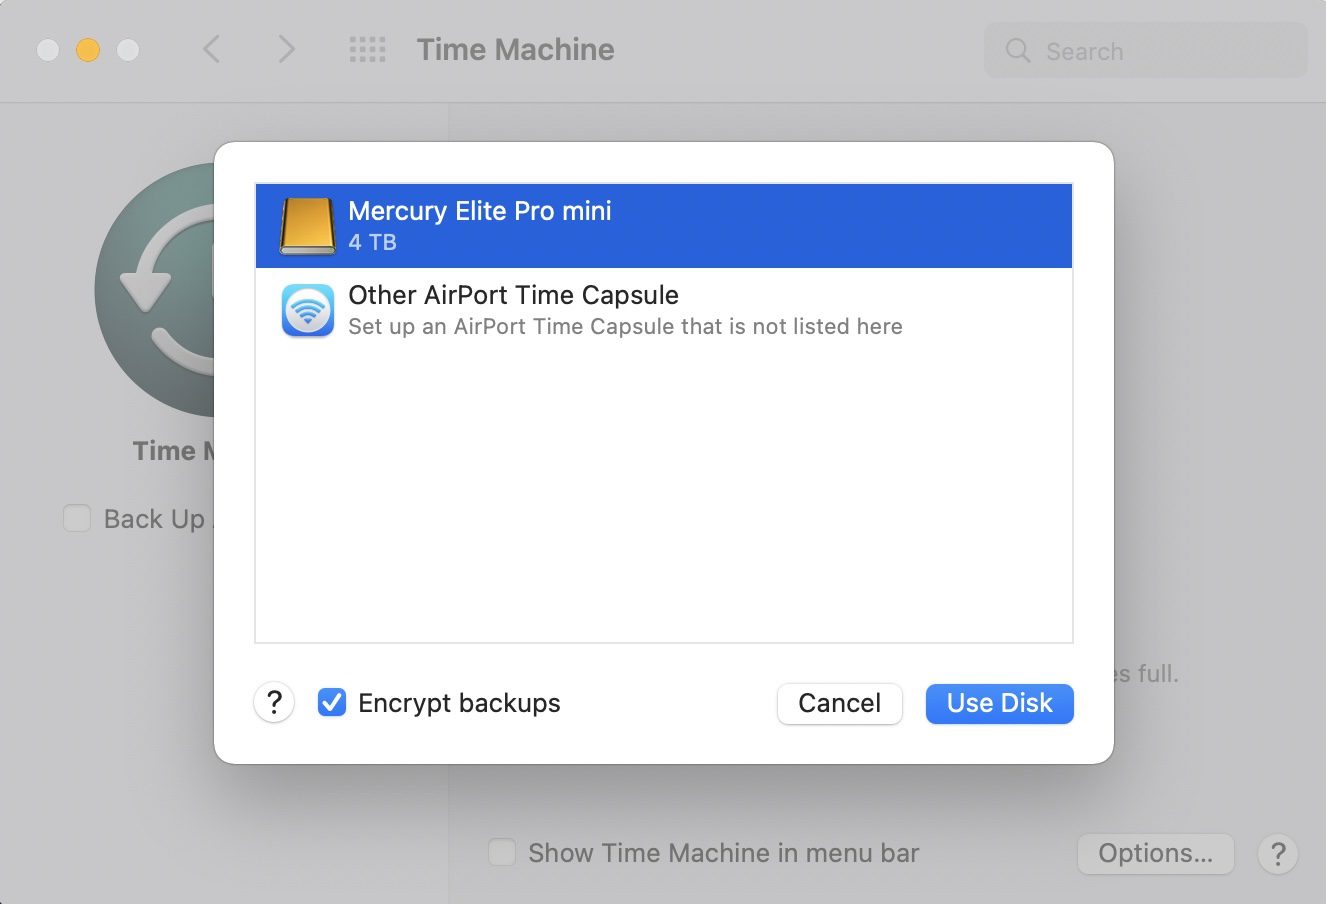
Note that you also have the option of encrypting your backups. For those with confidential information on their Macs, it’s a good idea to encrypt the backup. Checking Encrypt backups displays this screen:
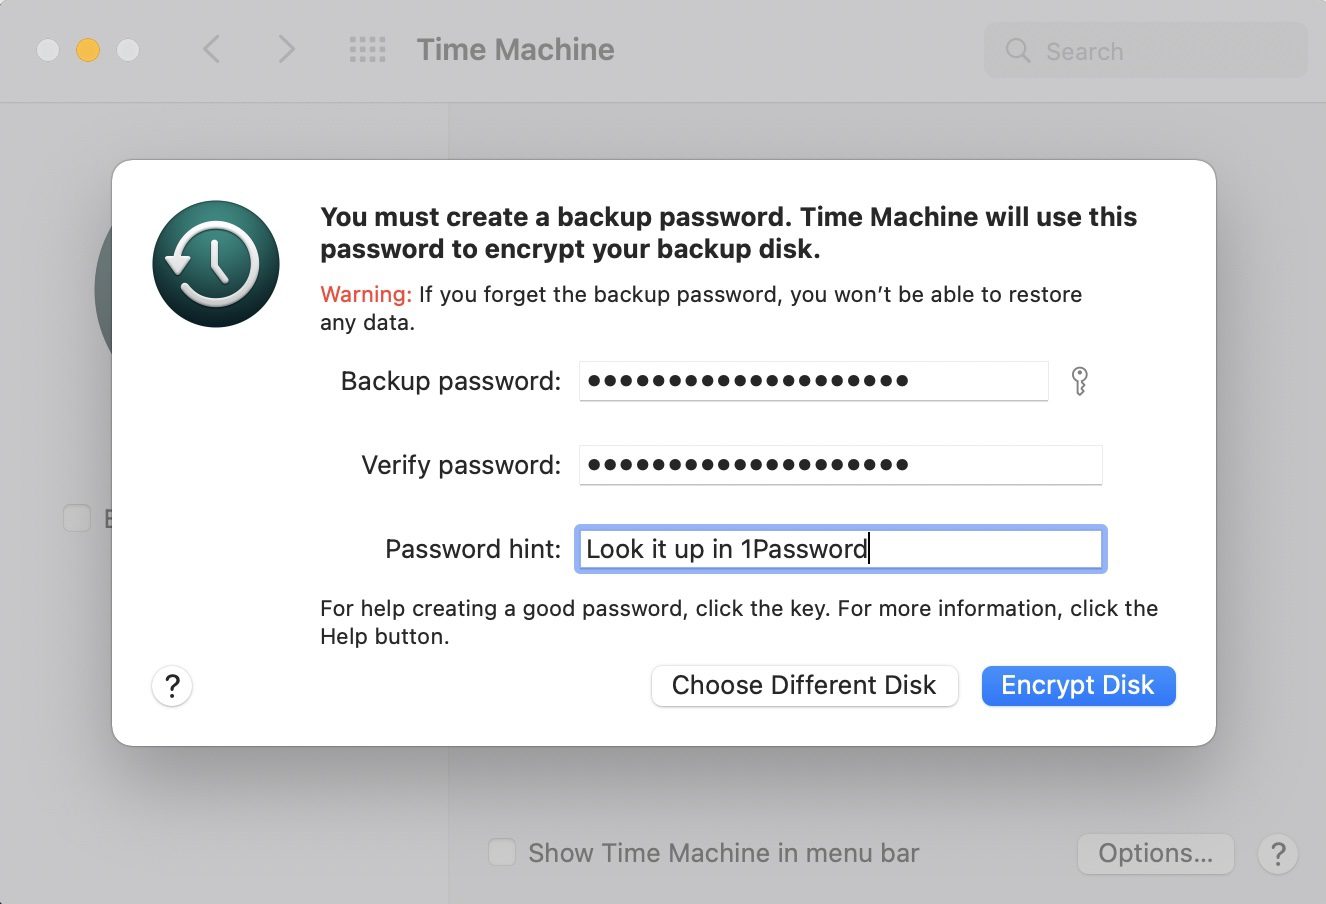
It’s very important to remember your backup password when encrypting backed up data. Forget it, and you won’t be able to restore the data in an emergency.
Click Encrypt Disk, and Time Machine begins to prepare the disk for backup, then starts the backup.
How long does a backup take?
For many users, the first Time Machine backup on an APFS-formatted drive takes about an hour. You can continue to work while the backup is taking place. Subsequent incremental backups are almost instantaneous.
Can I disconnect the backup drive?
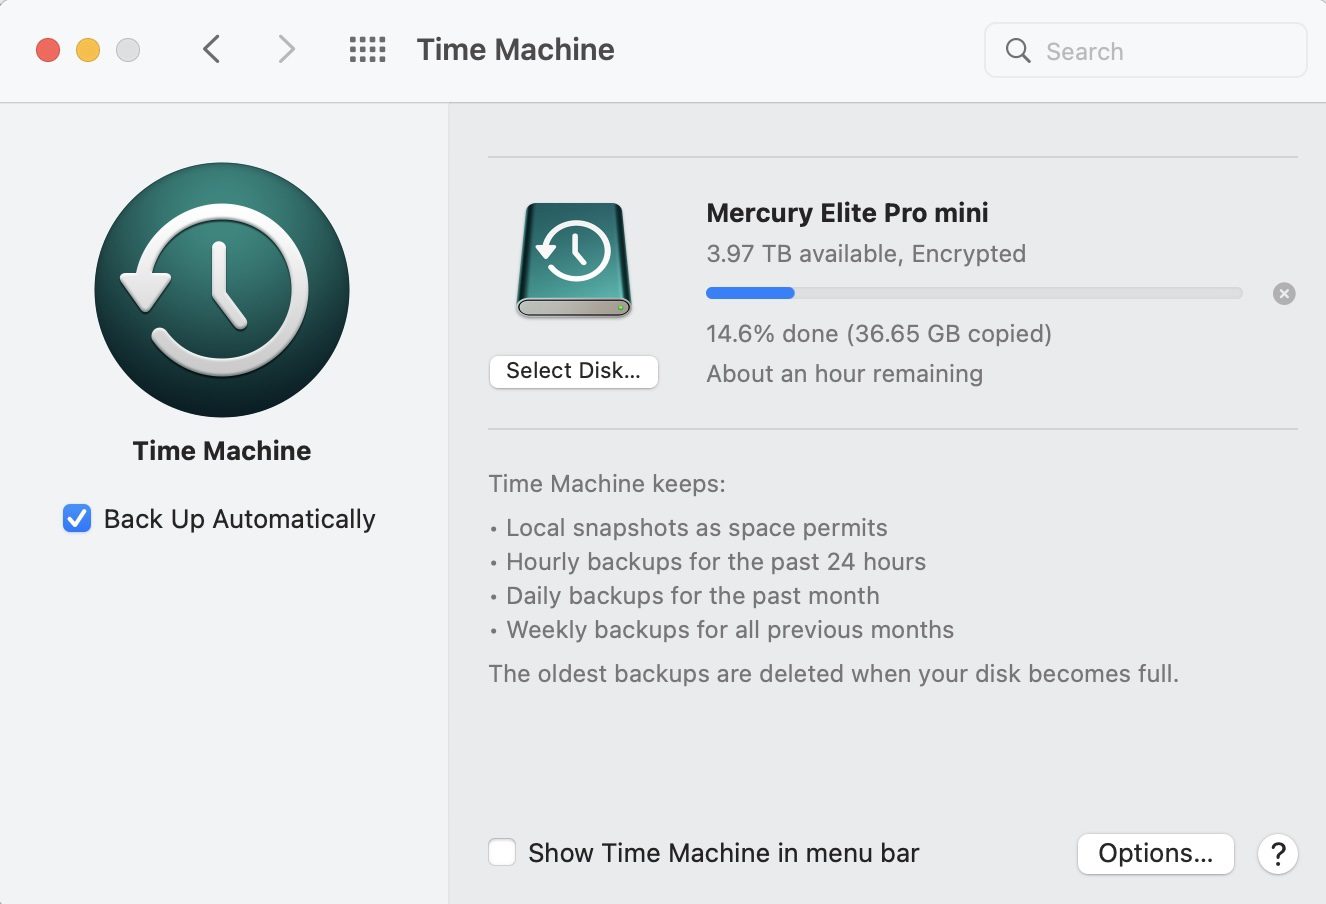
Some people want to make a backup, then disconnect the Time Machine drive in order to maintain a clean desk or keep the drive from being stolen. Be sure that the backup is complete before you disconnect the drive. The progress bar in the Time Machine pane of System Preferences (see below) shows if a backup is currently underway.
If Time Machine is not actively backing up your Mac, you can dismount (eject) the disk by doing one of the following:
- Drag the disk icon on the Mac desktop to the Trash to dismount it, or
- Right-click the disk icon and select “Eject ‘Drive name'”
Once the drive is dismounted, you’re free to unplug it from the Mac.
Will my Mac still be backed up?
Absolutely! Since macOS Big Sur, Time Machine stores a backup called a Local Snapshot hourly. According to Apple, “Time Machine saves one snapshot of your startup disc approximately every hour, and keeps it for 24 hours. It keeps an additional snapshot of your last successful Time Machine back-up until space is needed.”
Incremental backups
There’s a good reason to keep your drive connected to your Mac while you’re working — about once an hour, it checks for new and edited files on your Mac and backs them up.
These incremental backups are very useful! Let’s say you’re working on a manuscript and really goof up the file. Restoring the file from the most recent backup enables you to lose only the last hour of work, not the entire file. Think this is a far-fetched scenario? It’s not — Time Machine has saved me more times that I can count.
Time Machine stores the hourly backups on a rolling 24-hour basis. It also keeps a daily backup for the last month, and weekly backups for all previous months.
And, as you saw in the last section of this post, Local Snapshots keeps backing up even when your disk isn’t attached.
Time Machine in the menu bar
One last thing to bring up about Time Machine. Check the Show Time Machine in the menu bar box on the Time Machine preferences pane, and a small button appears in the menu bar. It looks like a clock.
Click that button and you see if a backup is underway or when the last backup was completed. If there’s no backup currently underway, a Back Up Now option is available in the menu. Selecting Enter Time Machine shows the history of backups on your device, extending from the most recent backup of the folder you’ve selected at the front to the oldest backup at the rear.
Restoring files from Time Machine
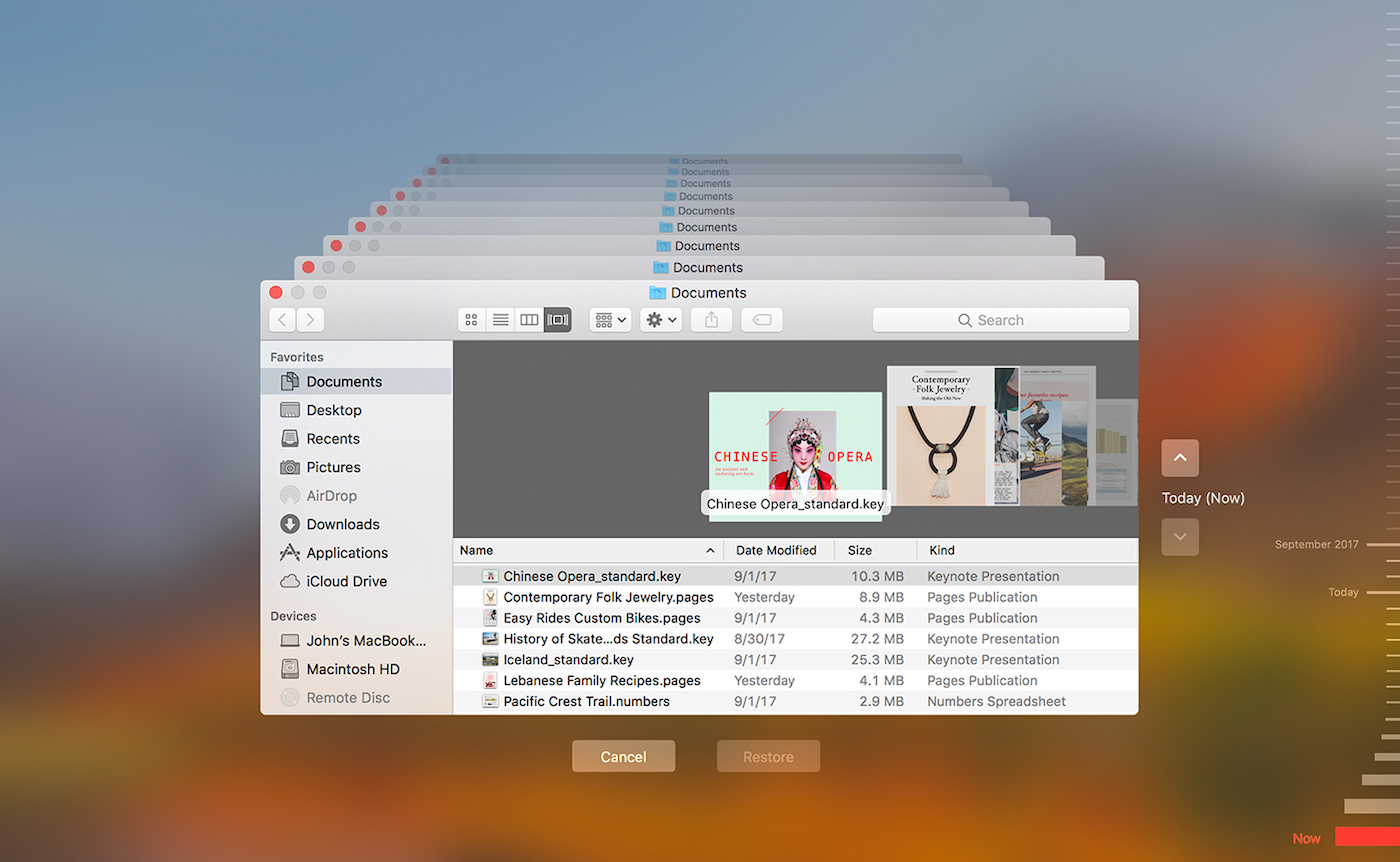
Someday you may need to restore a file from your backup, or move all of your files to a different Mac. Click the menu bar button and select Enter Time Machine. You’ll see a Finder view of the Mac Desktop or a folder (see image above)—you can use the sidebar at the left side of the Finder window to select the folder you wish to look into.
At the right side is a set of buttons for going backward or forward in time, as well as a timeline at far right. Use those to get to the backup date you want to restore from, select the file or folder, and then click the Restore button. It’s that simple, and it’s quite speedy.
Related Topics
This article is part of our 12 Days of Backups series that began on December 27, 2021 and ends in January, 2022.
- The First Day of Backups – Time Machine
- The Second Day of Backups – Third-party Mac Backup Apps
- The Third Day of Backups – MacBook Backups with the OWC Envoy Pro FX
- The Fourth Day of Backups – iMac Backup with the OWC Mercury Elite Pro
- The Fifth Day of Backups – Mac mini Backup with the OWC miniStack STX
In addition, you may wish to check out these other articles related to Time Machine:


I need help. After updating my miniMac M1 to Ventura 13.0.1, my OWC MiniStack STX added extra backups that I have no need for nor do I prefer any backup other than the single dated ones that were in place before my OS update. (I think the update created this new feature but can’t say for sure. Anyway, the update allowed me to schedule weekly backups vs the old hourly, dailye, monthly, ones etc. So I uninstalled the 3rd party app (forget name but it really worked and was easy to schedule) so now my M1 backs up the same weekly (as I scheduled) backups but “added .Spotlight-V100 and backup_manifest.plist? I do not want these two items backedup but don’t know how to stop this action and, as mentioned, I forgot the 3rd party app. Any suggestions would be most appreciated.
There are some important omissions in a TM backup, including Mail and Calendar.
Good Morning Steve, define “semi-retired”
Happy New Year, George!
Semi-retired means that I am not working full-time, just enjoying life and being a freelance writer for The Rocket Yard. Someday I’ll probably go to full retirement, but I love writing!
Steve
There is also HFS Explorer for Windows. It requires the Java SE runtime to be installed, but it works fantastically for HFS+ volumes and costs absolutely zero to use.
https://www.catacombae.org/hfsexplorer/